News
TRX Moves of the Week: The Founder's Favorite Moves
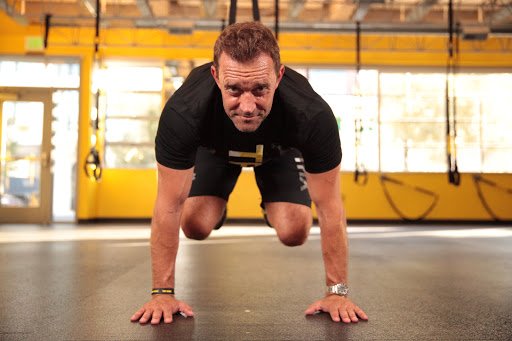
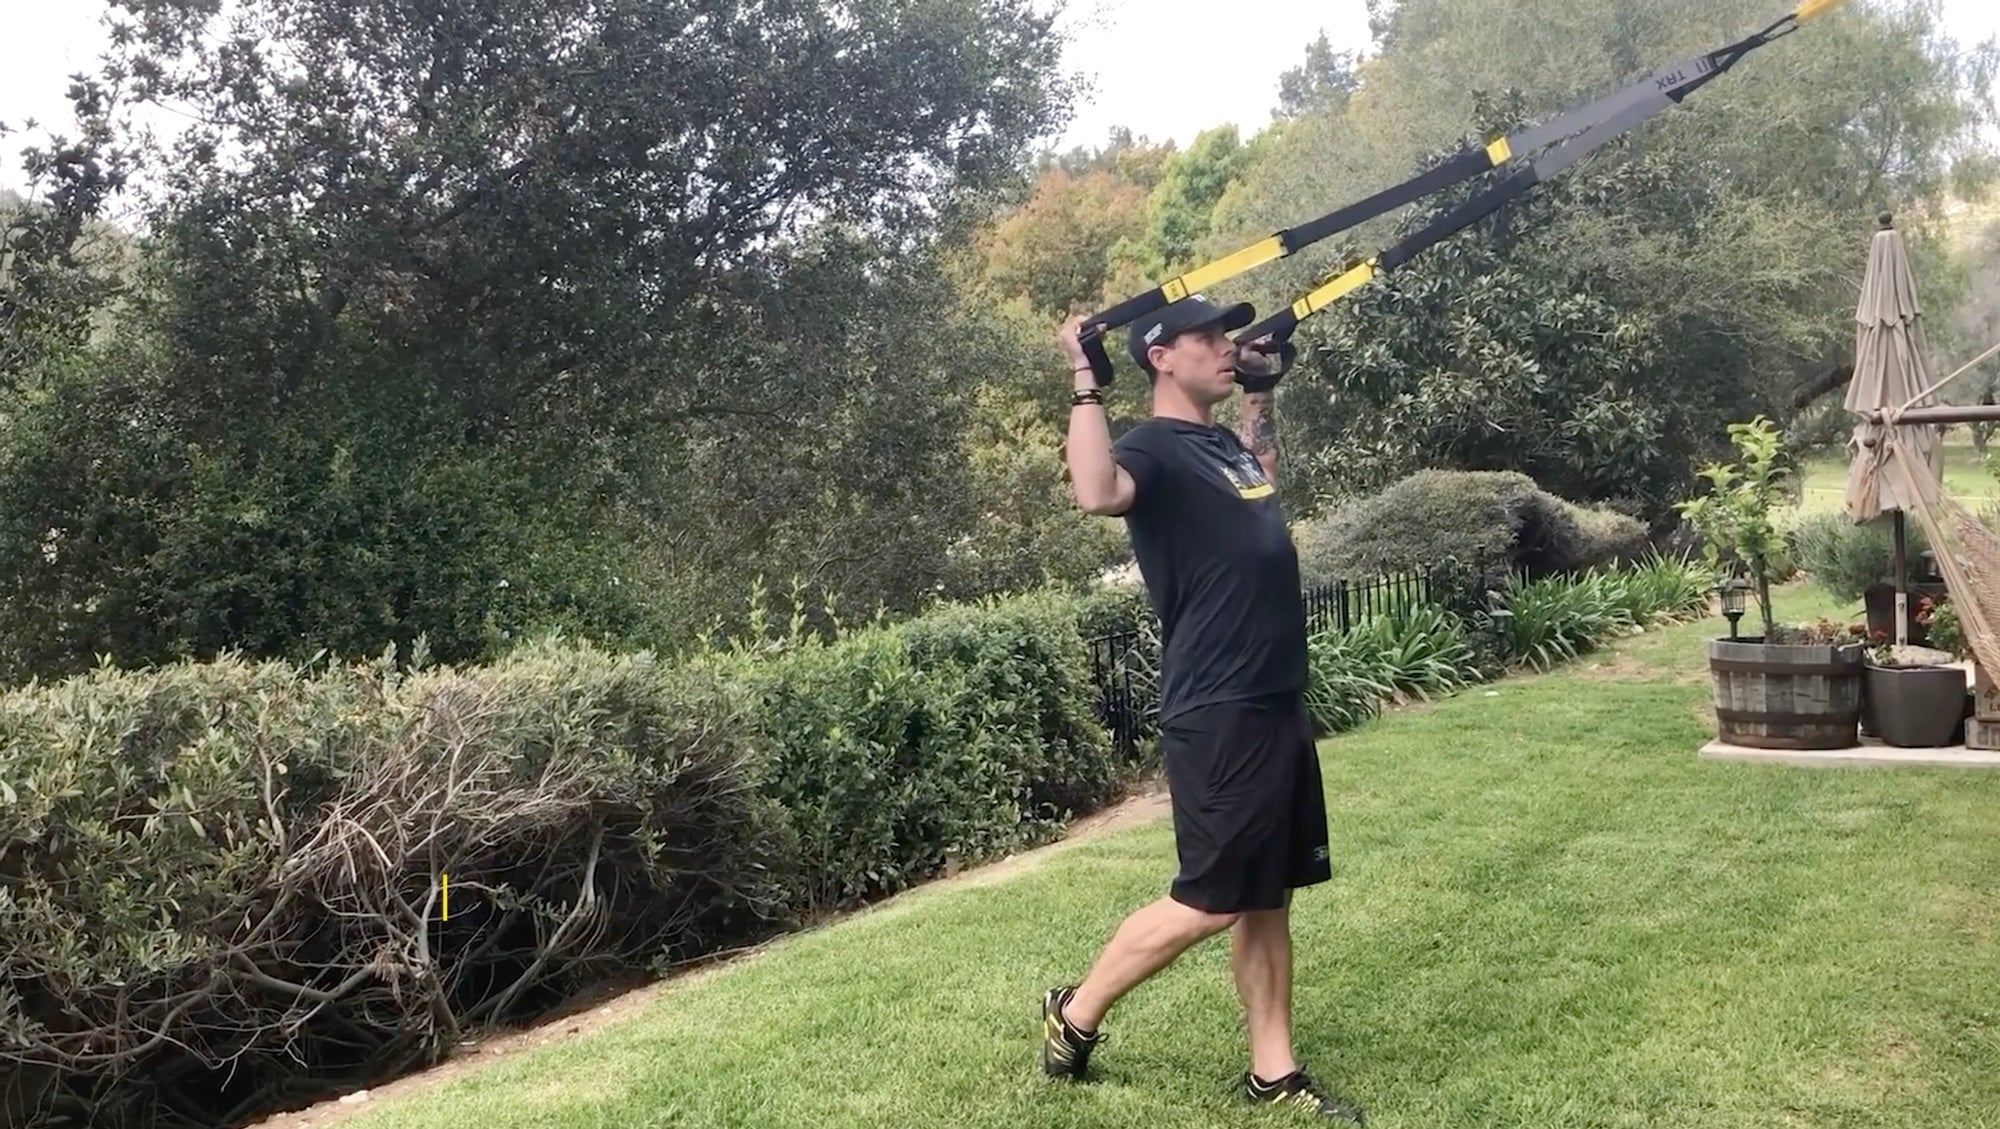
No one—and we mean no one—has been doing Suspension Training longer than TRX Founder Randy Hetrick. The former Navy SEAL invented the original Suspension Trainer prototype while deployed at a safehouse in Asia in the 90s, and has been championing the concept ever since. With decades of experience in training on-the-go, Hetrick knows all the tips and tricks for home fitness. The moves he’s digging right now? Exercises focused on combating work-from-home hunching and slouching. Randy is taking over Moves of the Week with three exercises that will help you stand taller, prouder, and stronger. All you need is your Suspension Trainer and your TRX Strength Bands. First up is the TRX Overhead Squat to Overhead Back Extension. Stand facing the anchor, with your straps adjusted to mid-length. Start with the overhead squat, and keep tension on the straps! As you come back up to standing, gently fall back while hinging at the waist to squat and hinge, all while squeezing your glutes at the top. Hetrick says this move will activate your body from the glutes and hamstrings all the way to your fingertips. “I do this either as a dynamic warmup before my workout, or I'll do it during the workout and just slow it down, really activate and grind through it,” he said. “Do a set of 15 of these things and you'll be hating life and loving it at all at once.”
For the second move, a Loaded Squat, trade your Suspension Trainer for two TRX Strength Bands. Loop one end of each band around the arch of your foot, then cross the bands behind you. Loop the other end of the band around each hand between the thumb and forefinger. With your palms facing up toward the sky, squat then extend your arms up into an overhead press. “I'm feeling a pretty good load there, and as these run up my back, they actually help my squat,“ Hetrick explained. Hetrick calls the third and final move a “Bandput” because it simulates a shotput throw a TRX Strength Band, integrating both extension and rotation. Start with one end of the band wrapped twice around midfoot, then shoulder the other end of the band on the same side of your body. For example: if the band is anchored to your left foot, you’ll load the other end of the band on your left shoulder. Like the press you just completed, the “shouldered” end of the band will still be looped across your palm between your thumb and forefinger. (Think of it like a server carrying a tray at a restaurant.) Squat down to “load,” then use your hand to push the band diagonally up and away from your shoulder—throwing away the tray—to “explode.” For variations on this move, Hetrick suggests playing with the speed or even leveling up to a heavier band. All three of these moves use an extension to open up your posture and strengthen your back muscles. Whether you’re at home or hitting the road, pack your Suspension Trainer and your TRX Strength Bands in your TRX pouch to keep up with your fitness goals anytime, anywhere.

TRX MOVES OF THE WEEK: THE BASICS
We all love a cool, new move to try out (and show off a little), but when it comes to getting strong, fit, and fierce, it’s all about getting back to basics—a few foundational moves with a twist that focus on compound strength (translation: multiple muscles at a time) to get reliably fitter, faster all on the TRX Suspension Trainer. THE MOVES MOVE 1: TRX Squat Row Strap setup: Mid-Length Your setup: Stand facing the anchor point. Hands are chest height, arms extended. What it does: Burns your glutes, quads, and hamstrings while working your entire upper back How it works:
Lower your hips down and back to a deep comfortable squat
Drive through your feet and return to stand with a TRX High Row
Repeat for 4 more reps, completing 5 total
Pro tip: You can adjust your speed or angle to make it easier or more challenging. Avoid rounding your shoulders at the bottom and arching your back at the top. MOVE 2: TRX Lunge with Chest Fly Strap setup: Mid-Length Your setup: Stand facing away from the anchor point. Hands are chest height, arms extended. What it does: Works your balance and stability, combining upper and lower push movements. How it works:
Take a big step forward with one leg and lunge down, opening your arms into a T
Press into the handles and ground at the same time to return to start
Repeat with the opposite foot and complete 10 lunges total
Pro tip: Be mindful of the front knee on every rep (don't let it bend past your toes) and maintain core tension throughout the movement! Move 3: TRX Hamstring Curl Strap setup: Mid-calf Your setup: On your back on the ground. Feet face anchor point. Heels in the foot cradles. What it does: Great for working your backside and overall core strength. How it works:
Raise your hips off the ground (or not). Keep your feet evenly pressed into the foot cradles.
Bring your feet toward your glutes, pulling knees toward your waist. Keep your hips level.
Reverse the motion to return to the start position.
Try to hold the start and middle positions for a couple of seconds.
Pro tip: Keep your head on the ground, always. To up the challenge, raise your hips off the ground and move further away! Move 4: TRX Reverse Crunch Strap setup: Mid-calf Your setup: Hands and knees on the ground. Feet face anchor point. Feet in foot cradles. What it does: Great for your core and stability in your shoulders. How it works:
Rise up into a strong plank, lifting your legs and hips while driving your heels into the handles.
Pull your knees toward your waist for a crunch.
Too challenging? Stay in a plank position and hold for a couple of breaths.
Pro tip: Be careful not to round your shoulders on the crunch. And be mindful of your low back when your feet are extended. A strong and stable plank takes practice! The best part about basics is 1) they work, 2) you can always make them harder or easier, 3) they’re the ultimate complementary moves, meaning you can add them to any workout without overdoing it on any one muscle. Or, of course, you can simply tie all these moves together into a HIIT workout by setting your reps (8 for beginners, 15 for a challenge), picking a time (15 minutes is solid), and then going as fast as you can. Stay on the lookout for more ideas next week. ‘Til, then, keep making moves. 💪 For ten years Miguel has been a key factor at TRX. Whether it’s teaching TRX classes at the flagship studio in San Francisco or presenting in front of hundreds of athletes at various trade shows around the world, Miguel delivers the ultimate TRX physical and education experience. When Miguel is not in front of a class he is either behind a camera shooting the latest and greatest TRX digital content, or working with the rest of the TRX education team to continue to meet the demands of this continually evolving fitness community.
TRX MOVES OF THE WEEK: SHOULDER SHRED
In this week’s installment of Moves of the Week, Master Instructor Austin Way takes you through a combo that will help with shoulder health and improve your posture, especially if you spend a lot of time sitting down.
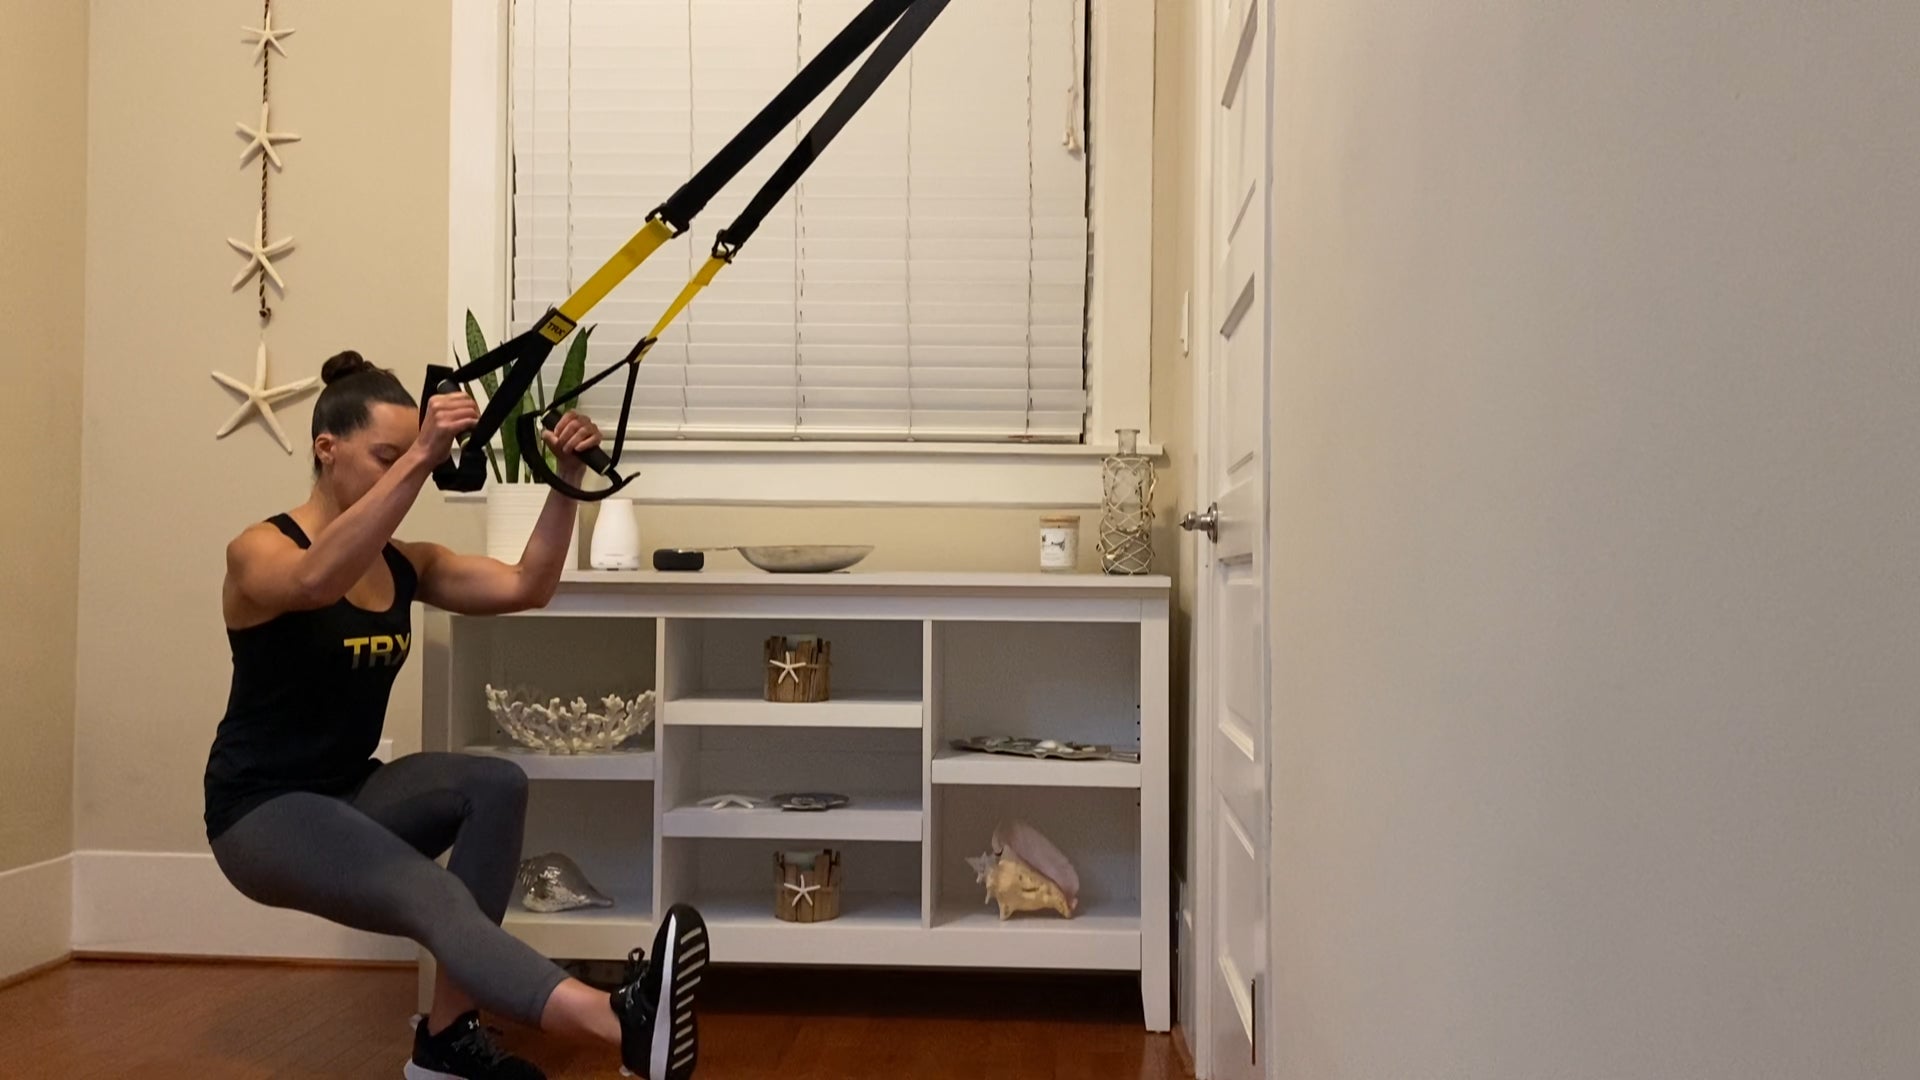
This combo kicks off with the TRX “W” Deltoid Fly. Start facing your anchor point and take the straps of your TRX Suspension Trainer to mid-length. Start at the end, or finish, position with your arms to a 90-degree angle, with your hands over shoulders and your palms facing the anchor point. Next, step your feet into an offset position. While keeping your elbows bent at 90 degrees, allow your hands to rotate down towards the ground from your shoulder girdle. Then, drive your knuckles back above your shoulders to return to the starting position.
Once you have mastered the TRX “W” Deltoid Fly, you can then mix in the TRX High Row to make a killer shoulder combo. Start the same way as you did when doing the TRX “W” Deltoid Fly. After you allow the downward rotation of the shoulder girdle, let the arms lower your body towards the ground by lengthening out of your arms all while maintaining an active plank. At bottom, create masses and spaces by pulling shoulder blades down and back before initiating the pull by bending elbows to 90 degrees, then driving knuckles back above the shoulders creating the letter “W” in the arms. Very important to always maintain tension in the straps the entire time!
Remember to always maintain tension in the straps the entire time, and enjoy!
Thanks for checking out this week’s TRX Move of the Week!
Austin Way is a Master Course Instructor for TRX® and the fitness director at Cal-a-Vie Health Spa in Vista, CA. Health and fitness have been a part of his life for as long as he can remember, for the fact that his mother has been a fitness professional for over 30 years now. He has a bachelor’s degree in Applied Exercise Science and a background in physical therapy, which allows him to design a proper exercise prescription for any fitness level. His passion in life is to inspire and motivate people to be their best possible self…to be BETTER every day. Stay Connected and follow him @austinwayfit
TRX MOVES OF THE WEEK: Make it a TRX Combo!
The TRX Suspension Trainer is an amazing tool for unilaterally training your body! Kristine will show you her favorite strength moves that target the upper and lower body.
The first move is the TRX Single Leg Squat to Cross Balance Lunge.
Adjust your TRX Suspension Trainer to mid-length.
Stand facing your anchor and start by stacking your elbows under your shoulders, center one leg to the anchor point and lift the opposite leg to 90 degrees at the hip.
Begin the movement by lowering your hips down and back.
Make sure to keep the weight in the center of your foot and knee over the ankle.
Move into the cross balance lunge by slightly opening your hips as you cross your free knee behind your working heel.
Return by driving through the heel of your working leg, squeezing your glutes and extending your hips.
To dial this move back a notch, kickstand your free heel in the single leg squat and touch your toes to the ground in the cross balance lunge.
The second move is the TRX Power Pull with Rotation.
Keep your TRX Suspension Trainer adjusted at mid-length.
Stand facing your anchor and start with your working hand beside your chest and your free hand reaching up the TRX main strap towards the anchor point.
Make sure to keep your shoulders down.
Begin the movement by rotating your free arm towards the ground while extending your working arm.
Make sure to keep your hips square.
Return by driving your working elbow straight back while rotating your free arm up and over the main strap as you bend your elbow.
Thanks for checking out this week’s TRX Moves of the Week and as always be sure to tune in next week for more moves!
Kristine is a fitness instructor at the TRX Training Center in San Francisco. Kristine has a Bachelor of Science Degree in Kinesiology and has NASM, FMS and TRX Advanced Group Trainer certifications. Kristine taught Physical Education and was a fitness instructor in Napa before moving to San Francisco to pursue her dream to work full time in the fitness industry. Her goal as a fitness professional is to share her passion for fitness through positive group training experiences for all fitness levels. Kristine is passionate about living a healthy lifestyle and loves working out, yoga and being active everyday! Stay connected and follow her @kristine_fit
TRX Moves of the Week: Get up, Stand Up Part 3
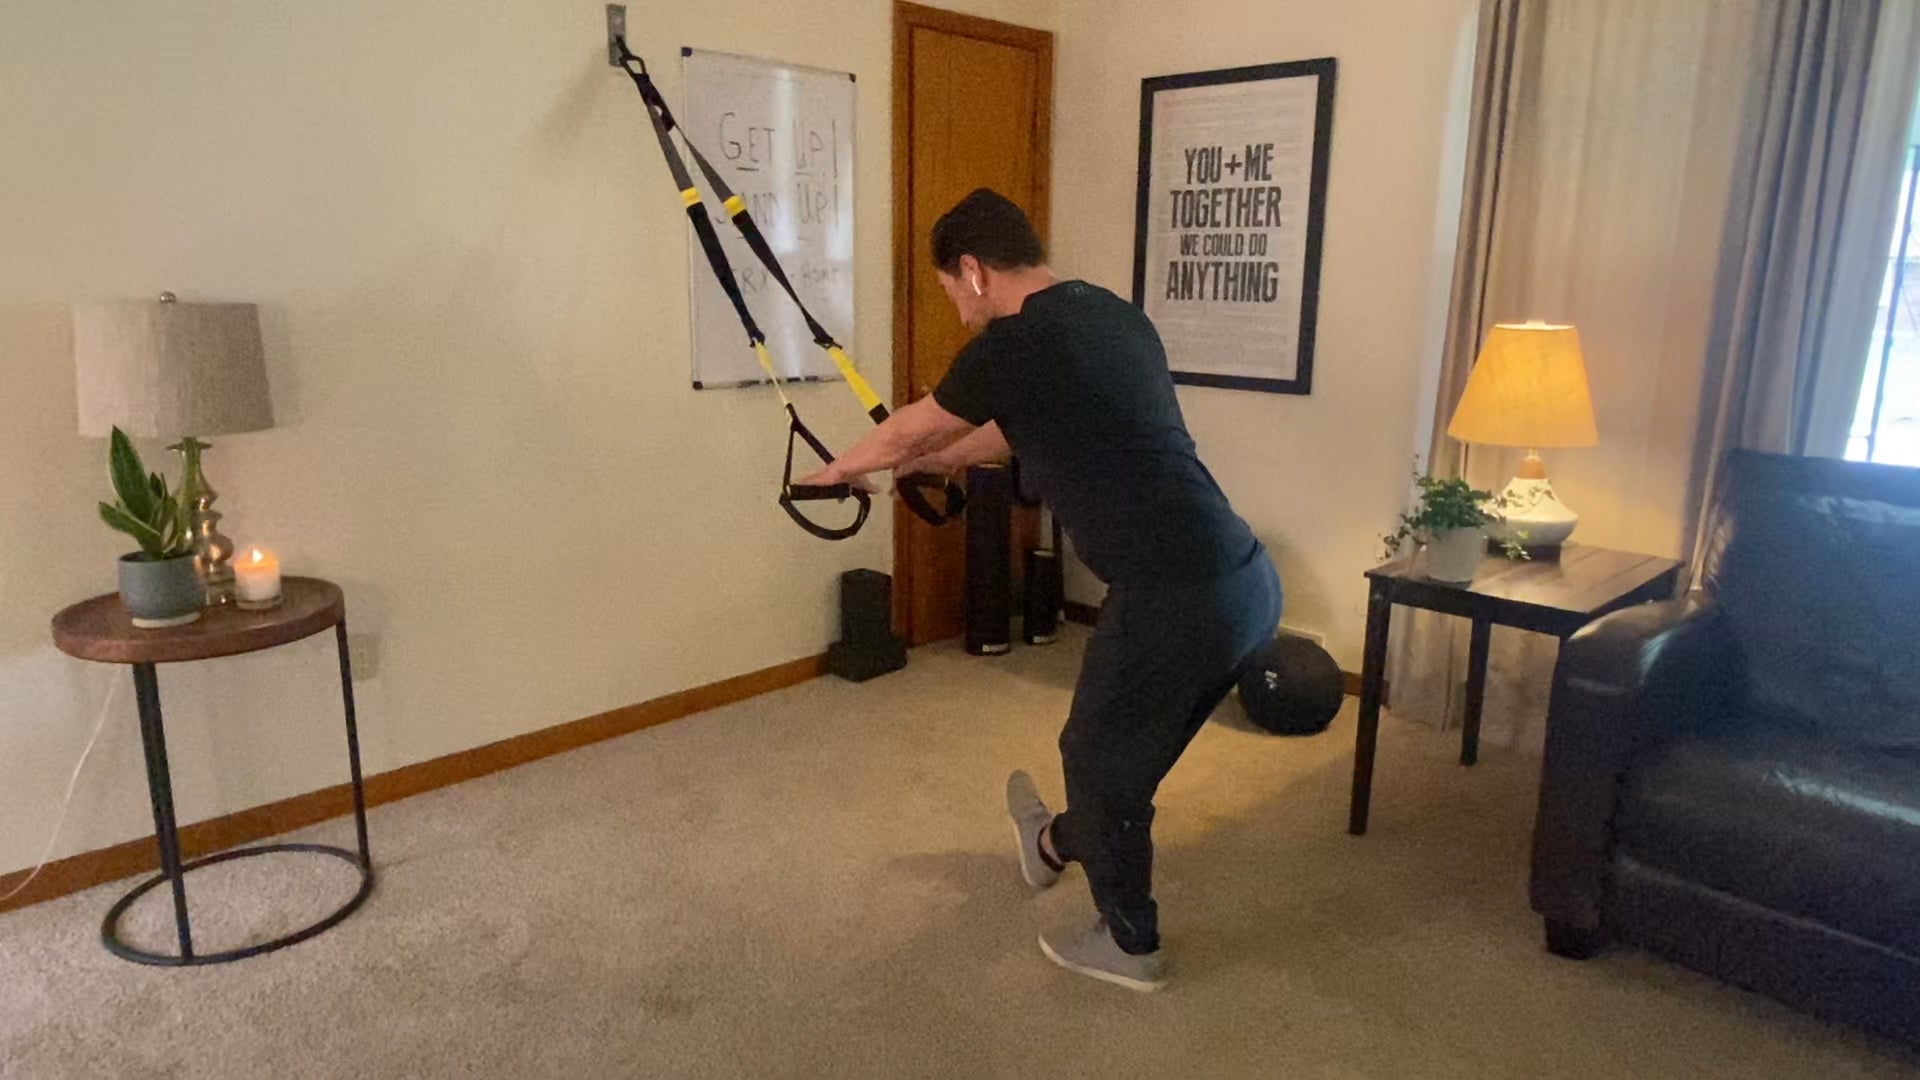
In the final installment of this three-part TRX Moves of the Week series, TRX Master Instructor Chris Nentarz will guide you through an anti-sitting flow that will create mobility and add stability to give our bodies the balance they need. If you want a refresher, you can view Part 1 of the series here and Part 2 here.
In this sequence, place your TRX Suspension Trainer at mid-length and begin facing away from the anchor point in an offset stance for our TRX Chest Stretch. Stay tall, have a proud chest, and establish your plank. From there, lean your sternum forward to open your chest. While maintaining the height of your head, settle into your back heel to create further length in the entire anterior chain, including your hip flexors. Keep your chin tucked and add some mini neck circles to further enhance your mobility.
Next, face the anchor point for a Shoulder T stretch. Activating and strengthening the posterior scapular muscles will help you take advantage of the new mobility gained in your chest stretch. Keep an offset stance to allow your upper body to drive the movement. Again, think tall and proud as you squeeze your shoulder blades together.
Next is an offset hinge stretch, which is great for lengthening the posterior chain. Leverage the TRX Straps to keep your core active and rotate your extended leg to add more hip mobility and sciatic nerve flossing. Keep your spine tall and work towards a nice deep hip hinge.
After your offset hinge stretch, work into a TRX I Fly. This movement will build on the mobility you've gained and will reinforce strong and stable posture. Tips for this one include pulling your shoulders down and back while maintaining a straight back.
Thanks for following along for this TRX Moves of the Week, three-part series, and be sure to tune in next week for more TRX moves!
Chris Nentarz currently lives in Buffalo, NY, and has over 20 years' experience as a Physical Therapist and movement coach. Chris has been a part of the TRX Movement for 10 years and running and is proud to be a TRX Master Instructor. His passion for helping people and his interest in all things movement shine through in his informative and effective sessions. Stay connected with Chris @cnentarz.
TRX Moves of the Week: Get up, Stand Up Part 2
Welcome back to TRX Moves of the Week! This is Part 2 of a Three-Part Series: GET UP, STAND UP. If you missed Part 1, check it out here!
Today we are going to use the Pendulum Principle to decompress our joints and lengthen our tissues! In TRX, the Pendulum Principle allows us to increase the intensity of many of our favorite TRX exercises by moving closer to, or further away from our anchor point, which is where we mount our TRX Suspension Trainer.
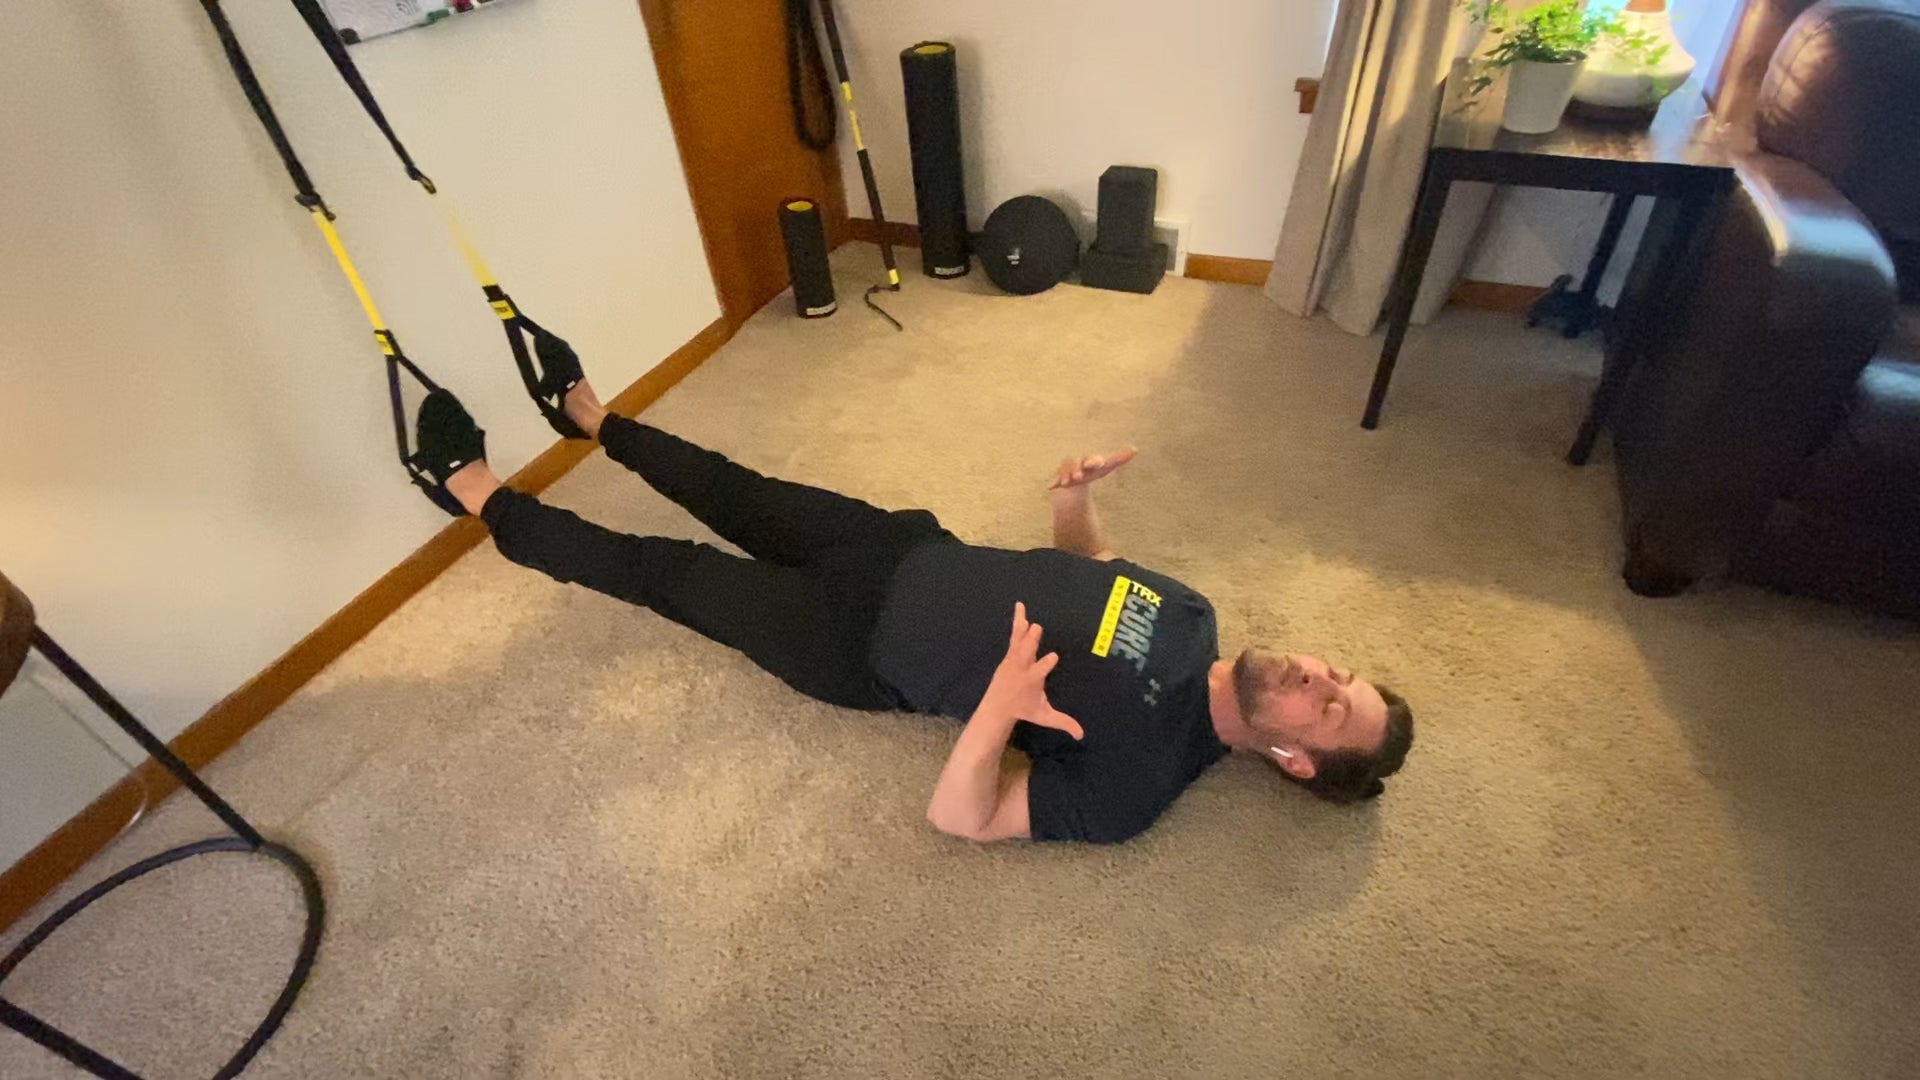
Begin with the TRX Suspension Trainer lengthened to mid-calf. With your heels in, move your body away from your anchor point, lay back and relax.
Allow your body to be heavy and enjoy the traction effect brought to you by the pendulum principle. To further decompress your body, extend both arms overhead and bend your body right and left. As you bend sideways, maintain length on both sides of your body. From there, you can add even more intensity by grasping your left wrist with your right hand, then pull gently on the left hand while bending to the right.
Use this routine to get out of your chair, away from your computer, kids, dogs, or whatever is occupying the majority of your time.
Self-care is so important, so taking as little as five minutes to yourself each day could be a mental and physical game changer.
Thanks for tuning in to this episode of TRX Moves of the Week and be sure to check in next week as we round out this three-part series with an anti-sitting flow.
Chris Nentarz currently lives in Buffalo, NY and has over 20 years' experience as a Physical Therapist and movement coach. Chris has been a part of the TRX movement for 10 years and running and is proud to be a TRX Master Instructor. His passion for helping people and his interest in all things movement shine through in his informative and effective sessions. Stay connected with Chris @cnentarz.
TRX Moves of the Week: Get Up, Stand Up - Part 1
If you're like me, you’ve recently experienced a spike in the volume of sitting you do each day. While sitting is necessary, it comes with a range of risks. This three-part series is designed to give you clinical and practical information you need to move and perform well while sitting is a big part of your life.
The first part of the series will discuss the science of sitting and offer 'movement snacks' as a solution to break the sitting cycle. The second installment will focus on posture and alignment and will include a TRX Suspension Trainer anti-sitting routine. We will conclude this series discussing the secrets of decompression—not only for our tissues, but for our nervous system as well—including some key ways to enhance your health in small spaces.
Snacks?
My favorite word in the English language is “snacks”, and I am here to recommend snacking as a great way to avoid the negative effects of sitting. That is, 'movement snacks', of course! Before I start to get hungry, let's discuss the science behind sitting and its toll on our system.
Is Sitting the New Smoking?
For many of us, our typical pre-quarantine days consisted of 10,000 steps—or 5 miles—with plenty of exercise demonstrations sprinkled in. Recently, we have experienced a spike in the amount of sitting we do and, unfortunately, there are risks associated with that. (1)
It is easy to see and feel how sitting steals valuable mobility from our joints and tissues. Prolonged sitting can also be detrimental to our skeletal systems, inhibiting our ability to obtain proper skeletal alignment. A quick snapshot of this would be to think of how it might take a minute or two to stand correctly after a long car ride. This is because sitting can overload certain parts of our spine. (Spoiler alert: there will be more about that topic in this installment of the series.)
The negative effects of sitting go beyond our musculoskeletal system. Research has linked sitting for long periods of time with a number of health concerns (2). Too much sitting overall, in addition to prolonged periods of sitting, increases the risk of death from cardiovascular disease and cancer. Other direct effects include obesity, increased blood pressure, high blood sugar, and excess body fat around the waist.
Is sitting the new smoking? Not quite. While sitting has negative health benefits, smoking is still far worse. Researchers report smoking increases the risk of death 180 percent, while sitting points to a decrease in our longevity by 9 to 10 percent.
Research suggests that the traditional approach of exercising for three to four 30-minute sessions per week is not enough to counterbalance the negative effects of sitting (3). In other words, our bodies need more movement for nourishment.
'Movement Snacks'
We certainly recognize the value of nutrient timing, especially more frequent and smaller meals. Why not adopt a similar strategy for our movement regimen in the form of 'movement snacks'?
Whether its standing and reaching your arms to the ceiling, performing ten squats every hour, or doing 4- or 20-minute movement sessions, the goal is to move more frequently. 'Movement snacks' do not have to be long. Spending three to five minutes can go a long way. And, just like with our nutrition, we want to eat a rainbow of movements. This will help keep our minds active and bodies balanced. In this week's installment of Moves of the Week, we use a traditional tool to give you a nourishing flow. A stability ball (physioball) can help make sitting more tolerable, and it is a great tool for mobility and stability.
While performing these movements, make sure to have fun, and remember you do not have to be at your tissues’ end range to receive the benefit of the movement. In other words, do not feel the need to overstretch.
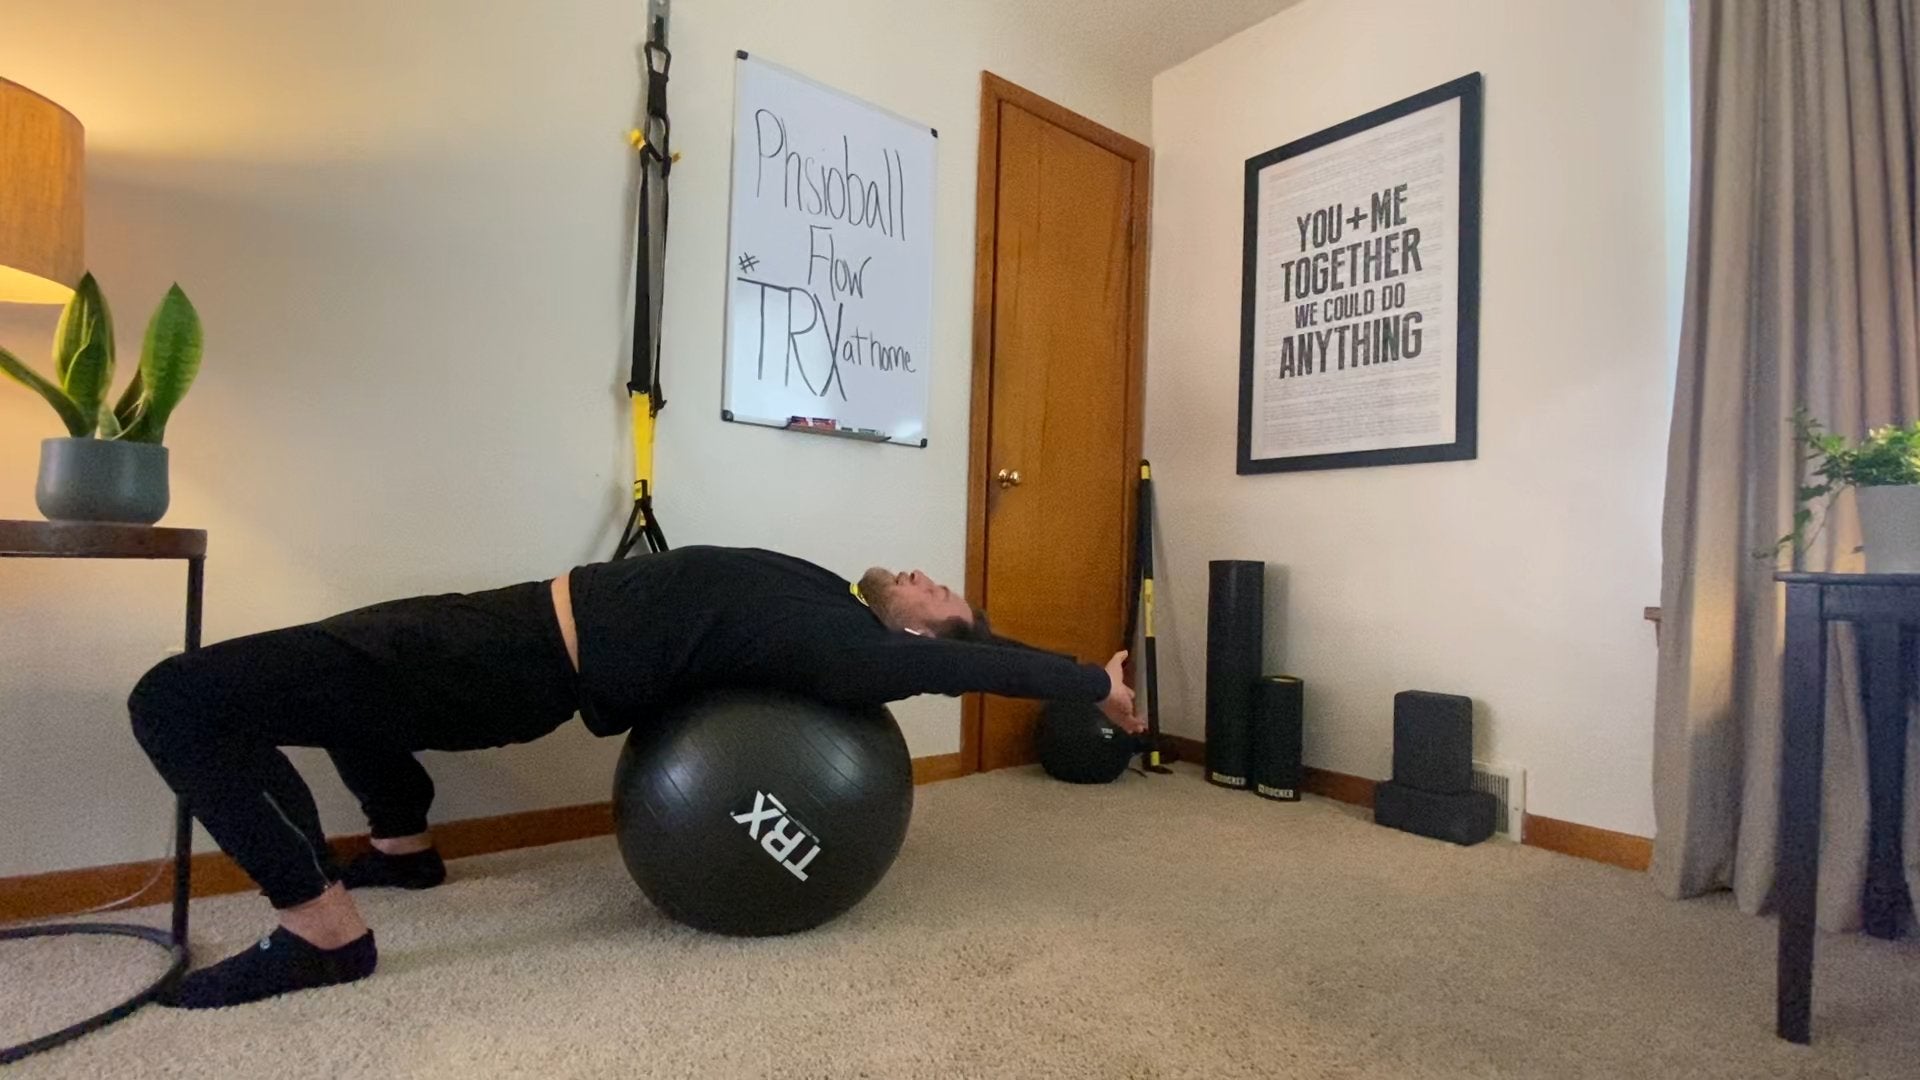
This sequence begins with a stability ball bridge—a great way to awaken the posterior chain of our bodies—and moves into segmental spine mobility. (Think Cat/Cow but on a stability ball.)
Use your arms to lengthen your full body by reaching in different directions, then transition to one side to lengthen the lateral line of the body in our long torso stretch. This movement highlights the benefits of what the physioball brings to the table! Use the shape of the physioball and create a distraction in your joints by “relaxing over the ball.”
This sequence finishes with “Stirring the Pot.” This movement creates 3-D spine stability and incorporates an important part of your body, your scapula. Think long and strong as you move your arms over a stable torso.
When performed together, these three movements work in synergy to lengthen the spine, mobilize the hips/T-spine and reset your posture. Don’t forget to use your breath to drive mobility and stability where you need it.
Frequent movement nourishes the whole body, not just the musculoskeletal system. Corrective exercise snacks can feed your skeletal alignment. Mobility shots can be helpful for your joints. A Met-Con medley can be great for your cardiovascular system. Supplement your mood and boost your energy with smaller, more frequent 'movement snacks'.
Join us next week for the next installment of this series as we build on the concept of 'movement snacks' and discuss posture and ergonomics and introduce an Anti-Sitting Sandwich on the TRX Suspension Trainer.
Baddeley, B. Sornalingam, S., Cooper, M. Sitting is the new smoking: where do we stand? Gen Pract. 2016 May; 66(646): 258. doi: 10.3399/bjgp16X685009
Vallance, J., Gardiner, P., Lynch, B., D’Silva, A., Boyle, T., Taylor, L., Johnson, K., Buman, M., Owen, N. Evaluating the Evidence on Sitting, Smoking, and Health: Is Sitting Really the New Smoking? American Journal of Public Health, 2018; 108 (11): 1478 DOI: 10.2105/AJPH.2018.304649
Patel, A., Bernstein, L., Deka, A., Spencer-Feigelson, H., Campbell, P., Gapstur, S., Colditz, G., and Thun, M., Leisure Time Spent Sitting in Relation to Total Mortality in a Prospective Cohort of US Adults, American Journal of Epidemiology, Volume 172, Issue 4, 15 August 2010, Pages 419–429, https://doi.org/10.1093/aje/kwq155
Chris Nentarz currently lives in Buffalo, NY and has over 20 years' experience as a Physical Therapist and movement coach. Chris has been a part of the TRX movement for 10 years and running and is proud to be a TRX Master Instructor. His passion for helping people and his interest in all things movement shine through in his informative and effective sessions. Stay connected with Chris @cnentarz.

TRX Moves of the Week: Full-Body Burn at Home
Zack Van Wagoner knows how to bring the burn! This week, he’s back with three TRX Suspension Trainer moves for a full-body workout at home.
First, you need to set up your TRX Suspension Trainer. Inside your home, simply toss the door anchor over a door, then shut the door to secure the anchor. Give the door anchor a sharp tug to make sure the strap is secure. (If you have the option of locking the door without locking yourself out, you may want to do that as well.) Next clip your TRX Suspension Trainer onto the door anchor.
This week’s first move is a TRX Lunge. Start with the straps at mid-calf position, and stand facing away from the anchor point. Hold both handles in your right hand, then slide your right foot through both foot cradles. With your right foot suspended, drop into lunge: extend your right heel toward the door so your right knee will lower toward the floor, all while your left foot, stays firmly planted. Push down into your left (front) foot to return to your neutral, standing position.
Zack recommends adding runner arms to the move to work on balance and coordination. If you have trouble with balancing, try raising your arms straight in front with one hand stacked on top of the other.
The second move is a TRX Side Plank. Place your toes in the foot cradles, and turn onto your hip out in the side plank position. Double-check that you are centered with your anchor point and that your toes are lined up as if you are walking a tight rope. (If your left arm is on the ground for your side plank, your right foot should be in front for that tight rope.)
Squeeze your legs, press your planted forearm into the floor, raise your top arm to the ceiling, and lift into your TRX Side Plank. Hold this position for 15-30 seconds. For an added challenge, throw in some hip dips to really get your obliques burning.
Our final move is a killer combo: the TRX T-Fly with a Bicep Clutch. Stand facing the anchor with your arms spread to their full wingspan in a T-position. (Tip: Zack recommends off-setting your feet for this move.) While maintaining your plank, lower down with straight arms and keep your ears, shoulders, and hips in a straight line, then extend your arms back into the T-position.
The next rep will be the Bicep Clutch: with palms facing each other, bend your elbows and fold the handles in toward your chest—just under your chin—before extending back to the T-Fly.
Continue alternating between the T-Fly and the Bicep Clutch for 30-45 seconds, then repeat on the left side before finishing with a final set of the T-Fly/Bicep Clutch combos.
For more TRX workout ideas, don’t forget to download the TRX APP. Every TRX Suspension Trainer purchase comes with free access to the app. Plus, right now, TRX is offering everyone three months’ free access to the app. To get started with your three-month trial:
Go to TRXStart.com
Create a profile and use the code YUPVKVHVRW
Download the TRX APP in the App Store or Google Play
Use login information from the profile you created on TRXStart.com.
Start with Zack's Moves of the Week, find a new routine in the TRX APP, and get ready to feel the burn with your #TRXatHome workout!

TRX MOVES OF THE WEEK: Compound Movements Part 3
In the third and final installment of this three-part, TRX Moves of the Week series, I will guide you through a lower body compound movement that not only challenges the core, but it improves hip mobility, and hip and leg strength—a super powerful combination that gets right down to business. The three distinct exercises performed consecutively are: the TRX Single-leg Squat, the TRX Crossing Balance Lunge, and the TRX Single-leg Hinge.
Each of the three TRX exercises can flow seamlessly from one to the next, once the TRX Suspension Trainer and the body’s start position are set up properly. So let’s start by adjusting the TRX Suspension Trainer to mid-length and stand facing the anchor.
Begin by performing the TRX Single-leg Squat. From the “stand-facing-the-anchor” position, hold the handles with elbows aligned directly under the shoulders (only at the set-up point) and palms facing each other. Raise one leg off of the ground and extend it directly out in front of the hip, if possible. Make sure to strongly activate glutes and core while standing tall in this start position.
NOTE: If this is too intense, the leg can be extended out to a lower height. If necessary the foot of the extended leg can even touch the ground and gradually raise, as strength develops. Also, please do not lean back--not even a little bit (unless, of course, there are knee issues/pain). Make sure to feel the body’s weight primarily in the middle of the foot while in this start position, and keep the weight there throughout the entire movement.
Lower the tailbone down into a squat maintaining a strong neutral spine and extended “float leg.” Press the foot off the working leg into the ground to get back up into a strong upright position.
NOTE: Again, be mindful to not lean back. While moving through this exercise, you can use the TRX Suspension Trainer to help you get back up (straight up) if needed, and not from a “leaned back position.”
Next, perform the TRX Crossing Balance Lunge. Bend the extended leg (from the previous exercise) keeping the knee at hip height. Gradually lower down into a lunge and bring the “floating-leg” knee back and behind the standing-leg heel. Press the foot of the working leg into the ground and stand back up while raising the knee back up to hip height.
NOTE: It gets tricky at this point and most people begin to lean back a bit. Again, only use the TRX Suspension Trainer to help you get back up (straight up) if needed, and not from a “leaned back position.”
Finally, to perform the TRX Single-leg Hinge, flex at the hip as much as possible while leaning and reaching forward with extended arms and fingertips. The standing leg has a very slight bend in the knee while the “floating leg” extends and reaches back as long and as high as possible. Keep the foot off the standing leg pressing firmly into the ground, maintaining the body’s weight in the middle of the foot. Keep the toes off the “floating leg” pointing toward the ground at the top of the movement; do not let them turn out. Maintain a strong neutral spine and use the glutes to lift the “floating leg” as much as possible. Slowly return to an upright position and be very mindful not to rush this part of the movement as many are tempted to do.
This no-nonsense combination movement can be performed in a number of ways. Begin by practicing a set of each of the three exercises. Later, combine each of the three in sequence (as described above) for a combo set. From here, stay on the same leg for a few combo set reps, or continue by alternating sides per combo set.
NOTE: Never perform these exercises too fast, or your technique and form may deteriorate rapidly.
Thanks for checking out this week’s TRX Move of the Week - Compound Movements, Part Three. Be sure to tune in next week for some more fresh TRX Moves!
Susane Pata is a Global Senior Master Instructor, Presenter and Author. She has been delivering TRX education sessions to fitness professional audiences worldwide for the last 12 years, with over 27 years experience in fitness. In 2004 she helped TRX Founder Randy Hetrick create and develop TRX's first-ever group fitness program. Soon after, as TRX’s Education Director she organized the company’s education department and later launched the first-ever TRX training studio in San Francisco. Simultaneous to this work for TRX she became one of the company’s first master educators and even though she is now based out of New York City, she continues to deliver education courses around the country, (of course now via the global pandemic, she does so virtually). Stay connected and follow her @fitnessshazam.