News

TRX
Home or Pro: Which Suspension Trainer Is Right for You?
TRX Training
If you have been clicking back and forth between the TRX HOME2 and PRO4 Systems while trying to decide which Suspension Trainer is right for you, we have the scoop on the differences between the two to help you choose.
When it comes to Suspension Training workouts, there’s no limit to the functionality of the two Systems. The basic design is the same: both rely on barrel lock adjusters to change the length of the straps, attach to an anchor point via a carabiner clip, have adjustable foot cradles, work with both the TRX Door Anchor and the TRX XMount, and come with one year’s access to the TRX App. If you love TRX Live workouts, you can follow along using either style of Suspension Trainer.
The main difference between the two options is the materials.
Because the TRX HOME2 was designed for personal use at home or on-the-go, it’s a little bit lighter weight (1.5 lbs) than the TRX PRO4 (2 lbs). The primary design difference, other than the color of the straps, is the handle. The TRX HOME2 SYSTEM has a slightly smaller, soft foam handle, while the TRX PRO4 SYSTEM has a more rugged, rubber grip handle. Because of the materials and designed with commercial use in mind, the TRX PRO4 grips dry more quickly when you disinfect them.
Both systems are designed to go anywhere and come with mesh carrying bags, but the TRX PRO4 straps have a locking carabiner to prevent theft. While the lock function is a feature that's nice to have, it’s unnecessary for most customers who work out at home.
Which TRX Suspension Trainer is right for you? That’s a personal choice. If you’re used to using the TRX straps at a gym, you’ve probably been using the TRX PRO4 SYSTEM and might prefer it for the sake of continuity. If you like to travel with your straps and tend to overpack, the half-pound-lighter TRX HOME2 SYSTEM may be a better fit. If the price is a concern, the TRX HOME2 retails for $50 less than the TRX PRO4.
No matter which style you select, you'll be bringing home the most versatile fitness tool on the market. Ready to get the most out of your investment? Take our quick fitness assessment quiz to create a personalized training plan that matches your goals. And if you've been looking to jumpstart your strength training routine, you can't go wrong with a TRX suspension trainer.
TAKE OUR TRAINING QUIZ
Try one out today:
TRX® PRO4 SYSTEM
BUY NOW
TRX® HOME2 SYSTEM
BUY NOW
TRX® TACTICAL GYM
BUY NOW
Start with your own workout regimen today or use the TRX Training Club to get hundreds of TRX exercises delivered to your phone from trained professionals.

TRX
5 TRX Exercises for a Stronger Back
TRX Training
Classic, few think about strengthening their back, until it starts to hurt or worse. Spend 10 minutes a day, a few times a week to take care of that back and it will take care of you, or keep you from needing to see the doctor. The TRX Straps are a simple and easy tool to get strengthen your back. TRX Master Trainer Kari Woodall shows us how with these TRX exercises.
Watch more with our TRX workout YouTube guide
TRX Resisted Rotation
For a stronger back, train your body in 3D and work the whole cylinder! The Resisted Rotation fires up your Lats and increases core activation that prepares your body to perform better in all exercises.
- SSW, Straps Mid-Length, Single Handle Mode
- Offset Stance, Inside leg forward hip width, Line up sternum on anchor, Engage core, Step towards anchor to load body more, Maintain active plank without tilt or rotation.
TRX Overhead Squat-Wall Slide
The OH Squat may be part of your current leg workout, but we’re turning on the afterburners by adding a Wall Slide, making it more dynamic and challenging. By maintaining constant pressure on the straps and rowing as you come out of the squat, you’re lighting up your backside from hands to heels.
- SF, Straps Mid-Length
- Arms in Y or I, Squat Stance, Maintain good posture and tension back on straps through hands while lowering hips down, Initiate Wall Slide with Scap while simultaneously driving up from the bottom of the Squat with hips.
T-Y Fly Combo
The T-Y Fly Combo should be a staple in your pulling repertoire.
- SF, Straps Mid-Length or Mid-Calf
- Arms in T, Offset Foot Stance to maintain constant tension through ROM, Maintain Plank while decelerating back bringing arms together, Initiate pull with shoulders and back, Pull with straight arms back to T, Alternate between T and Y.
Take Our Training Quiz
TRX Power Pull
Buckle up because you’re getting a TRX Training Trifecta with the Power Pull: a fantastic Unilateral Pulling exercise challenging your core and metabolic burn with Rotation and Speed!
- SF, Straps Mid-Length, Single Handle Mode
- Begin in Single Arm Row, Straighten elbow and open shoulders and hips simultaneously. Set Scapula down and then squeeze shoulder blades together to pull out of rotation and finish with Single Arm Row to return, Rotate in a plank and connected torso so hips and shoulders move and work together for effective power transfer.
TRX Pull-up
Feel the burn with a little DOMS (delayed onset muscle soreness)! The Pull-up is the final exercise, and for good reason: this exercise will revisit you for days after your training if you control the eccentric part of the Pull-up.
- Straps Over-shortened
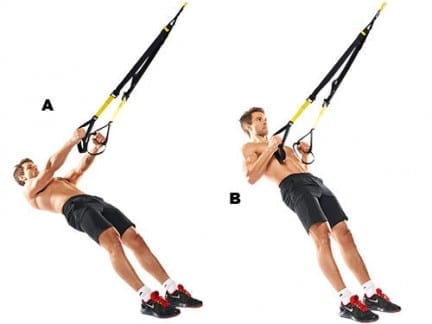
- Sit under anchor, Set shoulder blades down and then squeeze shoulder blades together to pull up, Resist gravity and decelerate on the way back down by trying to slowly push arms overhead while maintaining active plank and open neck space.
P.S. Get other TRX back exercises straight from the TRX App.
Do your next workout with our TRX equipment:
TRX® PRO4 SYSTEM
BUY NOW
TRX® HOME2 SYSTEM
BUY NOW
TRX® TACTICAL GYM
BUY NOW

TRX
5 Common Questions About Installing the TRX XMount
TRX Training
If the thought of permanently affixing your TRX Suspension Trainer to your wall or ceiling makes you a little nervous, you’re not alone. One of the reasons the TRX Suspension Trainers are among the most popular fitness tools in the world is that you’re not required to drill, hammer, or construct anything to use them at home. But, while you don’t need to pull out your toolbox, some people prefer to install a TRX XMount to create an indoor workout space beyond the door frame.
So if you're curious about the specifics, we're here with answers to the most common questions about TRX XMount installation. (Want to find the perfect TRX setup and exercises for your home gym goals? Our quick assessment quiz can create a personalized suspension training plan just for you!) Whether you're mounting in drywall, concrete, or wooden beams, proper installation is crucial for safe and effective workouts.
TAKE OUR TRAINING QUIZ
Do I need to hire a professional?
Maybe. If you’ve never used a drill or a stud finder, or you don’t know the difference between a nail and a screw, there’s no shame in calling a pro to ensure the job’s done right.
Can I anchor my TRX XMount to drywall or plaster?
No. Your TRX XMount must be anchored to a stud to support your weight. Using a standard drywall anchor can destroy your wall and could result in injury. You can install the TRX XMount on concrete, but TRX does not recommend mounting it to brick or cinder block walls.
What tools do I need to install my TRX XMount?
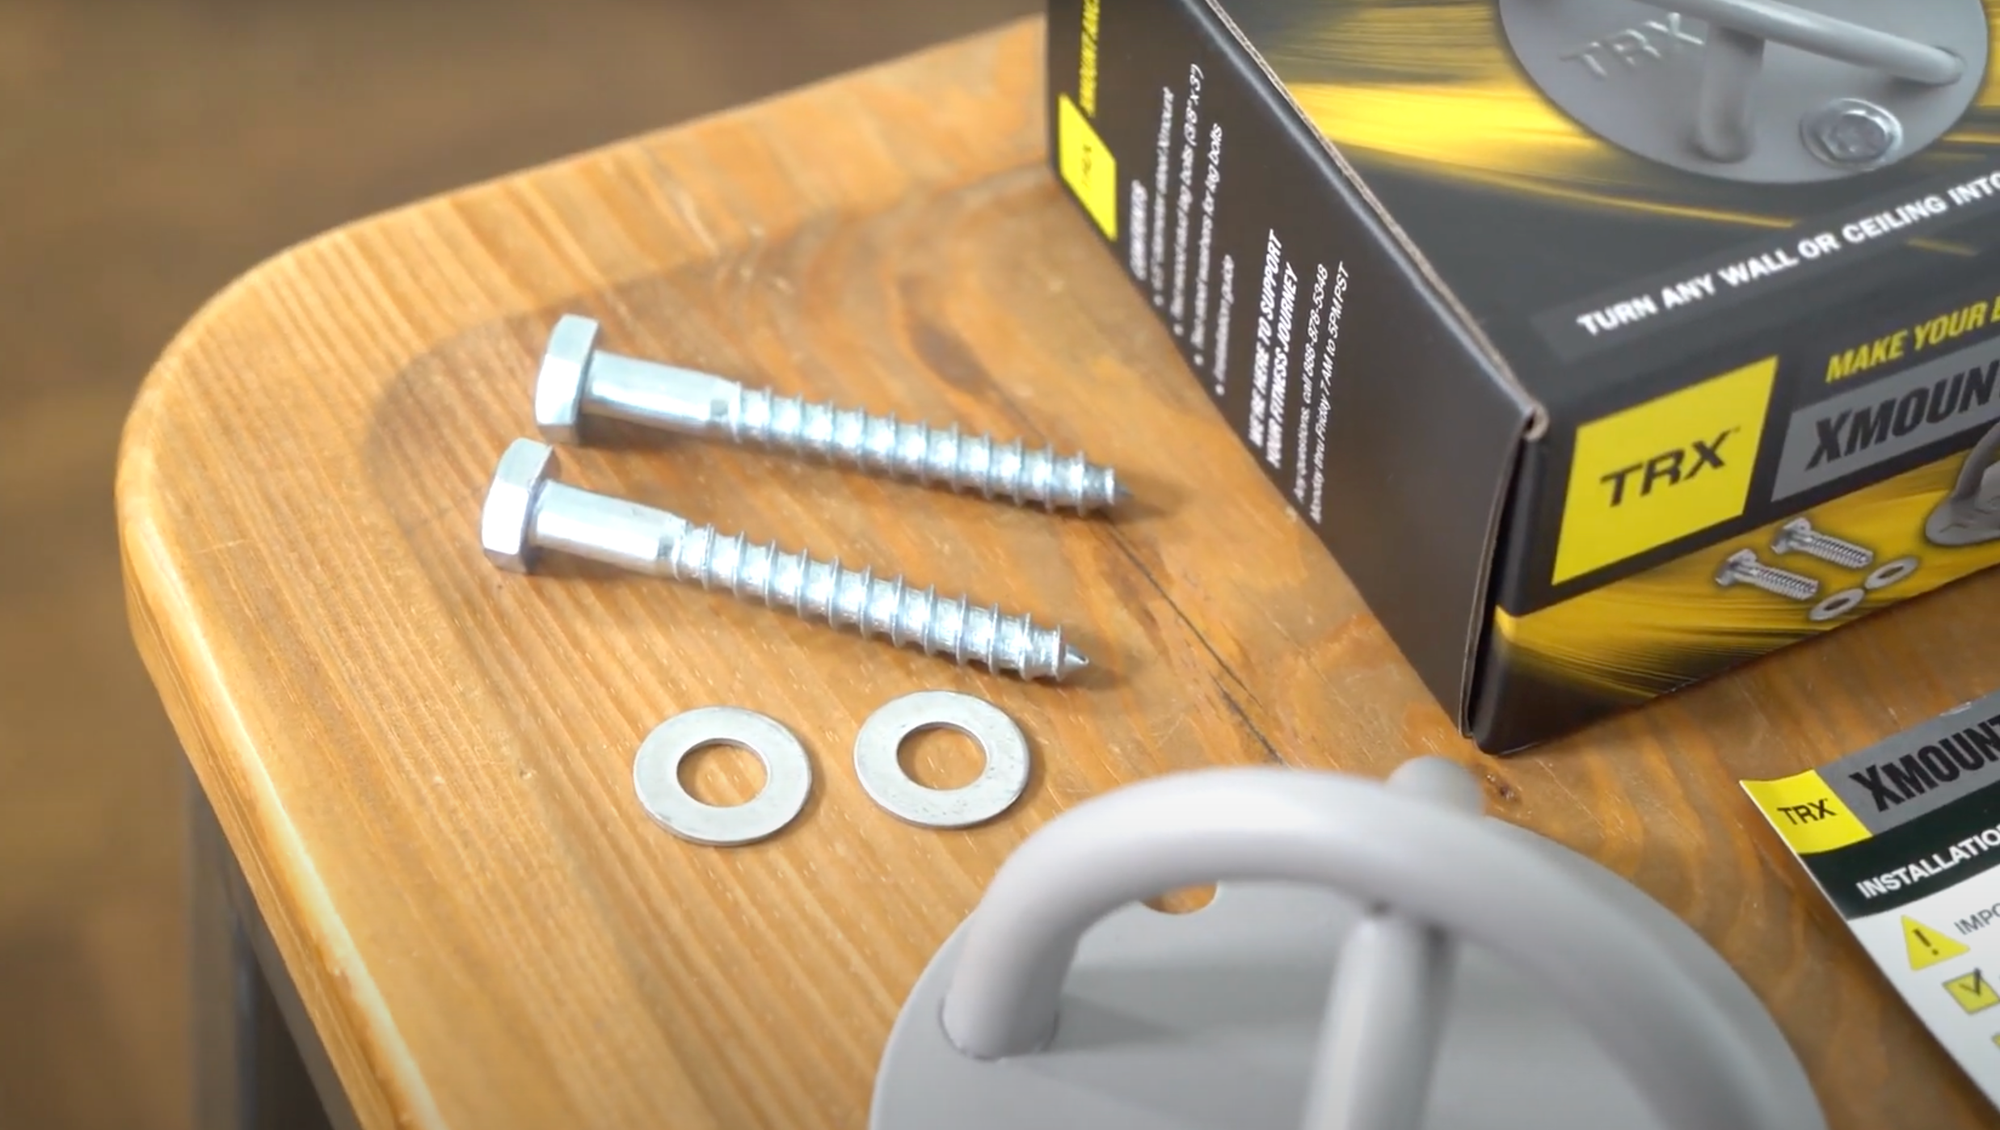
You’ll need a drill with a ¼-inch bit, a stud finder, a ratchet, a pencil, and the included hardware, (two ⅜ inch x 3-inch wood stud lag bolts and two washers). If you’re installing your TRX XMount on a concrete surface, you’ll also need two ⅜ inch x 3-inch concrete lag shields, (sold separately at TRXtraining.com or your local hardware store).
Where should I install my XMount?
The choice is yours! You’ll need to find a stud in your wall, an overhead stud, or an overhead beam that is 7- to 9-feet off the ground. If you’re installing your TRX XMount overhead, position the mount at least 3 feet away from the nearest wall to allow for 360° movement for your favorite TRX exercises.
Does your home have extra high ceilings? You may need to add the TRX Xtender to ensure that your Suspension Trainer isn’t too high. The bottom loop of the Suspension Anchor—that’s the loop the Suspension Trainer carabiner clips into—should be 6 feet from the ground.
Does the TRX XMount come in multiple colors?
Currently, the TRX XMount is available in white or grey, but you can always paint it if you want it to blend more naturally with your wall or ceiling. Because it’s made of steel, plan to prime it first, then finish with a coat or two that matches your wall color.
For more help installing your TRX XMount, watch Zack Van Wagoner demonstrate proper installation in the video below, and be sure to read the installation guide included with your TRX XMount.
Where can I buy an XMount?
You can buy an XMount right below along with the other TRX products you'll need to build the perfect home gym:
TRX® PRO4 SYSTEM
BUY NOW
TRX® XMOUNT
BUY NOW
TRX® DOOR ANCHOR
BUY NOW
Once you've installed your TRX XMount, your suspension trainer will be good to go. Use TRX Training Club to try some suspension-specific workouts:
