News
TRX
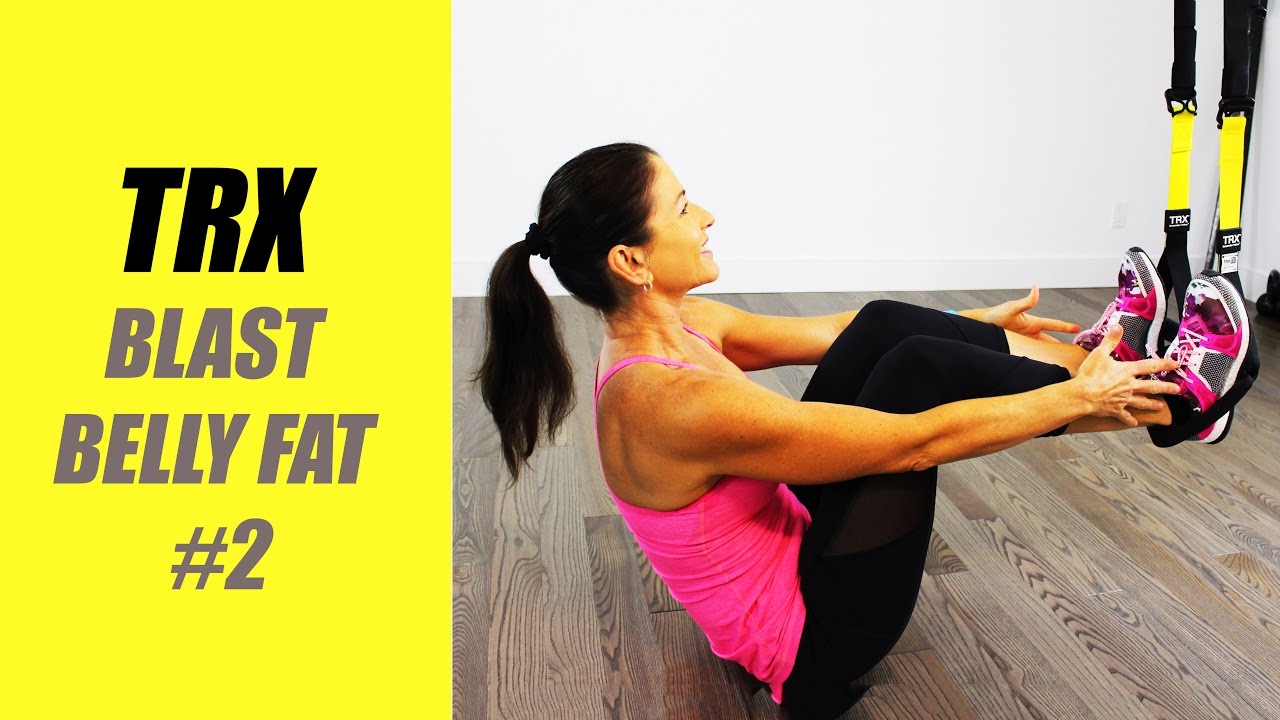
How To Lose Belly Fat With TRX
If you are looking for a quick trick to shed some excess belly fat, TRX could be a good place to start. Unlike almost any other training system available, TRX Suspension Training challenges your entire body in all planes of motion creating a huge metabolic effect and helps you build lean, toned muscle.
First off, you should know that you are not alone in your quest to trim down. Every month there are 110,000 Google searches for "how to lose body fat," on average 51% of American adults report that they want to lose weight. Not sure where to begin? Take our quick fitness assessment quiz to get a personalized workout plan that factors in your current fitness level and weight loss goals. Though challenging, you can make a lot of headway toward trimming down your waistline with these simple tips and a structured approach tailored to your needs.
TAKE OUR TRAINING QUIZ
1) Stop eating foods labeled “Low Fat” or “Low Calorie”Though it sounds like a good idea, the oh-so-popular “low-fat diet” has had some big negative consequences for the American metabolism. When fat and calories became the enemy, the food industry rushed to provide more low-fat and low-calorie options. The problem was that when they removed the fat, the food tasted terrible, so the industry loaded these new “healthy” options with loads of sugar, salt and artificial sweetener to compensate.The result was that we started ingesting copious amounts of sugar in place of fat. And while sugar, by volume, has fewer calories than fat, your body process sugar and fat in dramatically different ways. When you have excess sugar in your system your body turns it into fat - and typically this is the kind of fat that accumulates in the belly, hips and butt.Instead, try eating less-processed, whole foods without added sugars, salts and chemicals. Your body will process these calories in a totally different and more efficient way, and you will find yourself more satiated, with more consistent energy levels.
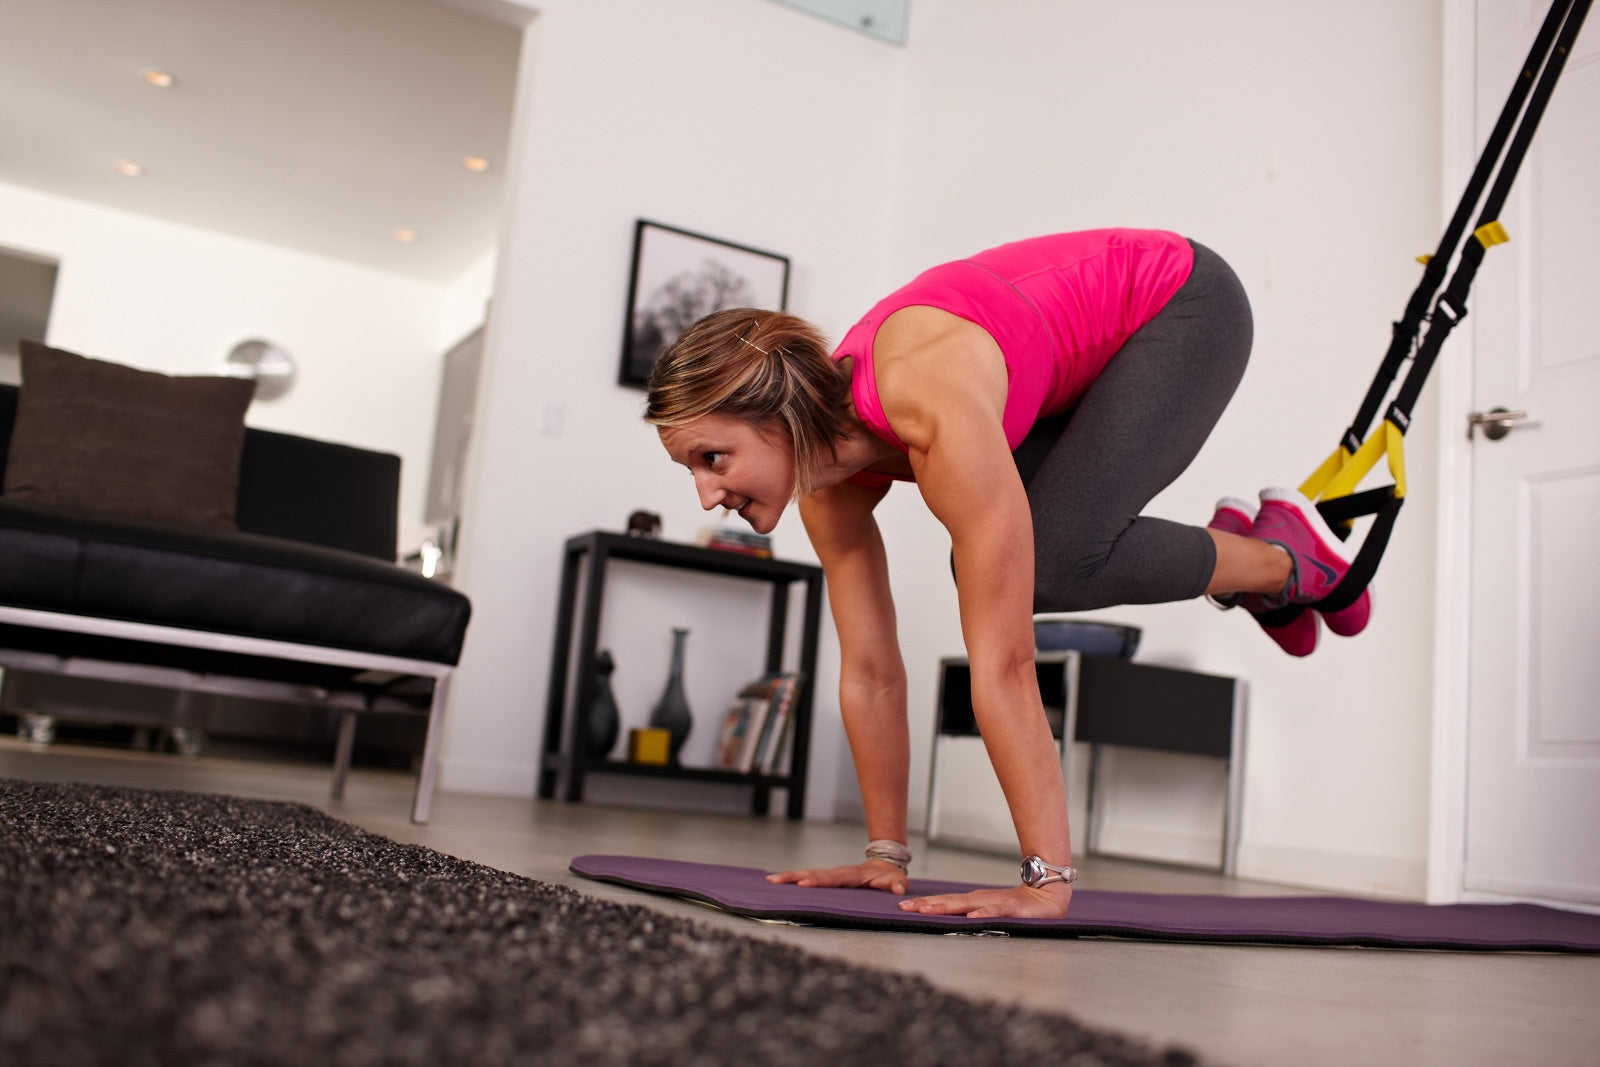
The TakeawayThe fewer things done to your food between its source and your mouth, the better - most of your food should be close to its natural state, colorful and unprocessed.2) Stop focusing on “problem areas”Sorry, there are no amount of crunches you can do to lose your belly fat. In fact, crunches are probably one of the least effective exercises you can do to slim your waistline. If you want to make a big impact on your “problem areas,” think about the bigger picture. Focus on total-body exercises and workouts that challenge your entire body. This will burn more calories and improve your functional fitness - the fitness that you use in everyday activities.This kind of holistic approach to your workouts will make you feel better and move better no matter what you’re doing, making it easier to live a more active lifestyle, and in time helping you improve your problem spots. The TRX Suspension Trainer delivers an incredible total-body challenge with every exercise, providing a huge metabolic effect that will help you move and feel better than ever.
The TakeawayUsing more muscles means burning more calories. Incorporate total-body exercises in your workouts to get the biggest bang for your training buck.3) Progress over perfectionWe’ve all been there; you missed your small window to make it to the gym or your favorite group class is too full, so you decide to take a day off. The next day your boss schedules a meeting over your lunch hour so you miss the run you had planned for that day. This pattern adds up, then the weekend comes and you try to make up for a week off with a marathon session at the gym, totally exhausting yourself and killing your workout motivation for days.Remember this: One meal or one food does not make you fat or out of shape - just like one workout does not lean you out out or make you a champion. Over time, all the small things you do consistently make a big difference. Making the healthy choice for meals and pushing away from the table before you’ve overdone it, are simple things you can do every time you eat. The same thing goes for your exercises plan, small doses performed consistently can significantly contribute to your strength, mobility and fat loss goals.
So if you only have 15 minutes, do a 15 minute workout, even though you had more scheduled for that day. There is a lot you can do with just your bodyweight and a little space to move you toward your goal. A really effective tool to have for these situations is a TRX Suspension Trainer, they set up in a matter of seconds to any sturdy door, overhead bar, fence or vertical pole, allowing you to get exactly the kind of workout you need in the time and space you have. If you don’t know what kind of workout you want to do, try the free TRX App with four free total-body workouts you can do anywhere.
The TakeawaySmall doses performed consistently can significantly contribute to your strength, mobility and fat loss goals. Don’t stress the small stuff, and keep your eyes on the prize. For more information, take a look at our weight loss calculator
Don't have any TRX Training gear yet? Here are some options to get you started:
TRX® PRO4 SYSTEM
BUY NOW
TRX® RIP TRAINER
BUY NOW
TRX® BANDIT
BUY NOW

How to Get Started With Your TRX Suspension Trainer™
The best type of workout gear is the type you use. We think the TRX Suspension Trainer™ is pretty fantastic, and we want you to feel the same way, so we’ve put together a quick tutorial—and a free workout video with TRX Training Club® Coach Niko Algieri—to help you get comfortable with your TRX Straps.
The Set-Up
There are two critical pieces for every TRX workout: The TRX Suspension Trainer and an anchor. If you’re brand new to Suspension Training®, you’re probably starting with either the Door Anchor or the Suspension Anchor. (Both come with every Suspension Trainer, but if you happen to lose either, we sell replacements.) To maximize your workout, try to find a space at least eight feet long by six feet wide.
The Door Anchor is a black strap with a loop on one end and a padded square on the other end. You can toss the Door Anchor over any hinged door, and then close the door to secure the anchor. (Ideally, you want to use a door that opens away from you.) Once you shut the door, clip the Suspension Trainer carabiner through the loop, and you’re ready to begin.
The Suspension Anchor is the long, yellow or black strap with a carabiner at one end and loop at the opposite end. You can wrap it around a basketball pole, a tree trunk, an exposed beam or a play structure, like a swing set.
To set up your Suspension Trainer with the Suspension Anchor, first clip the carabiner on the main body of the Suspension Trainer to the bottom anchor loop of the Suspension Anchor just below the TRX badge. Do not clip it in any other loop of the Suspension Anchor.
Attach the Suspension Anchor to the anchor point by wrapping it as many times as necessary to ensure the bottom of the Suspension Anchor hangs at about six feet from the ground. This is the ideal height to perform all TRX exercises. If your anchor point is either taller or wider than expected, use a TRX Xtender to accommodate those adjustments and ensure your TRX is still at optimal height.
Clip the carabiner in the Suspension Anchor into one of its intermediate loops, or around the Suspension Anchor itself, and pull it tight to make sure it’s secure. A tip for attaching the TRX to a smooth bar or pole is to wrap the Suspension Anchor several times around it to prevent it from sliding side to side. Always remember to weight-test your TRX before using it by pulling hard on it.
Adjusting Your Straps
In the middle of each strap on your Suspension Trainer, there’s a square-shaped Barrel Lock Adjuster, and—just above it—a tab. (On the Home2 and Pro4 systems, the tab is yellow. On the Tactical and Digi Camo systems, it’s black.) In its “locked” mode, the Barrel Lock Adjuster faces up and down.
To shorten the length of your straps, tilt the Barrel Lock Adjuster toward you, so that it’s parallel with the ground. Keeping it parallel with the ground, use your free hand to pull up on the tab of the strap you’re shortening. When you let go of the Barrel Lock Adjuster, it re-locks its position. Repeat on the second side before beginning your workout.
To lengthen the straps, flip the Barrel Lock Adjuster toward you and pull down while holding it open. Some people find it easier to extend both sides at the same time.
Whether you’re shortening or lengthening the straps, it should be easy to adjust the length when the Barrel Lock Adjuster is fully open.
The Workout
Now that you’ve got your Suspension Trainer set up, it’s time for the fun part: working out. Above, Coach Niko Algieri is introducing seven signature exercises: TRX Low Row, TRX Mid Row, TRX High Row, TRX Chest Press, TRX Y-Fly, TRX Bicep Curl, and TRX Tricep Press.
Finding the Sweet Spot
People at every fitness level turn to Suspension Training because it’s scaleable. Depending on your stance and your angle to the anchor point—remember, that’s the spot where you connected your carabiner to the loop—you can make an exercise easier or harder.
Here’s a quick tip as you get started.
When you’re standing, walking closer to the anchor point makes an exercise easier, stepping away from the anchor makes it harder. You can also think of it this way: the steeper the angle, the greater the challenge.
Learn With the Best
Working with a trainer is one of the smartest ways to level up your fitness routine, but it doesn’t have to cost a fortune: You can access the full TRX Training Club lineup of Live and On-Demand classes for only $19.99 per month. New members get a free trial, so sign up, hop into class, and soak up the expertise of dozens of world-class trainers and hundreds of class options as you begin your TRX journey.
Try one of our TRX products today:
TRX® PRO4 SYSTEM
BUY NOW
TRX® HOME2 SYSTEM
BUY NOW
TRX® TACTICAL GYM
BUY NOW
How to Fit a Home Gym in a Studio Apartment
Tune into daytime television, and you’ll see commercials for complete home gyms—especially during resolution and “beach body” seasons. (Bowflex, anyone?) If you have a large home with with space for full-body weight training equipment, those big machines might be the right choice for you. But there’s a misconception that only people with a sprawling house have room to exercise. In reality, you can get a full-body workout in a studio apartment or a dorm room if you choose the right modalities and equipment.
The amount of space you need depends on your height. The width of the area should be at least equal to your wingspan, (a measurement of fingertip to fingertip, with your arms in full lateral extension; this is usually the same as the height), and the length should be large enough for your to lie down flat with your hands and toes fully extended in opposite directions. Height requirements can vary: ideally, you want enough space for an explosive jump since jumping is an easy way to increase your heart rate. Keep in mind, however, that the average ceiling height is only 8’ tall. If you’re over 6’ tall, you may have to avoid those big jumps indoors. For example, if you’re 6’ tall, your workout would be approximately 6’ x 7’.
To be fair, 42 sq. ft. is a significant chunk of real estate in small home, but it doesn’t have to be permanently dedicated to fitness. You could simply push a coffee table or sofa to the side to clear the area for your workouts. Once you’ve settled on a space, the next step is choosing types of exercise.
The most fuss-free exercises are driven solely by your bodyweight. Think squats, jumping jacks, planks, push-ups, skaters, and burpees. When you want to add variety to your routine, there are lots of small tools that you can add into the equation, like bands and gliders, that will occupy relatively little space in a small home. (Most of those tools will fit into a file box of milk crate for easy storage when you’re finished.) If you’re looking to incorporate weights into your routine, something as simple as a kettlebell could be a smart purchase. Kettlebells are ideal for squats, swings, snatches, thrusters, and walk carries. They help you combine strength and cardio while engaging multiple muscle groups during workouts.
Prefer to stick with an all-in-one solution for your small space? Think about the TRX Suspension Trainer, a full-body tool that adapts to any and every body. It’s easy to adjust how much bodyweight you apply to your “load” with the Suspension Trainer—simply adjust your angle by taking a step forward or back—so you can make exercise easier or harder without upgrading to a new tool. Plus, the straps easily fold into a small carrying pouch, so you can take or store them anywhere.
Almost any space, even a studio apartment, can accommodate a home gym. When the commute to exercise is standing between you and your fitness goals, it’s time to stop scheduling your life around business hours, and start bringing the gym to you.

How to Communicate More Effectively
You’ve spent plenty of time and money learning how to develop life-changing training programs. You can assess physical function at a glance. You get goosebumps when calculating VO2 Max. But all of that means nothing if you aren’t able to effectively communicate what you know with your clients.
Of all traits that make up a qualified coach, communication is at the top of the list. That's why we've compiled our best tips for becoming a top-notch communicator. And since every coach's style and every client's needs differ, we recommend taking our quick fitness coaching assessment quiz to receive personalized communication and exercise guidance tailored to your specific goals. Whether you're training elite athletes or helping beginners start their fitness journey, these proven communication strategies will help you connect with and motivate your clients effectively.
TAKE OUR TRAINING QUIZ
Focus on the Foundations.
If you’ve gone through any of our courses, you know that TRX has developed a standard system of cueing to guide individuals through each movement. Known as NAPS-MR, there are six elements that ensure that your clients and class participants understand and complete each exercise safely and in uniform fashion.
NAPS-MR, which is an acronym for Name the Exercise, Adjustment, Placement, Start, Movement and Return, includes all the steps that will get your client through the exercise, from A to Z.
Here’s an example:
N: TRX Inverted Row
A: Over shortened
P: Ground facing
S: Chest below anchor, arms extended over chest, knees bent to 90 degrees, shoulders should be positioned slightly lower than hip, hips pressed up, chest lifted
M: Drive elbows back, pull body towards anchor point, keep knees bent at 90 degrees, maintain plank
R: Lower body down until arms are fully extended, maintain plank
On a side note, it’s important to notice the simplicity of the information presented here. It would be easy to overinflate an exercise with loads of cues throughout the movement—squeeze your glutes, draw the belly button into the spine, shoulders back and down, maintain a long spine, for example—but there’s only so much info the human brain can hold onto. And when there are too many balls in the air at a time, the likelihood of dropping all of them increases. Practicing NAPS-MR helps to avoid information overload for simple, high-quality movement.
Understand Your Audience.
Tony Robbins is arguably one of the most effective speakers and influencers around today. One of the traits that helped him build such a robust following—each of his live events bring in anywhere from 5,000 to 10,000+ audience members—is his ability to appeal to each individual.
He says, “To effectively communicate, we must realize that we are all different in the way we perceive the world and use this understanding as a guide to communicate with others.”
Not everyone responds to language and cues in the same way and so it’s up to you to figure out what makes your client tick and then adjust your language accordingly.
You may be an anatomy buff and know exactly what it means when someone asks you engage your lats while in push-up position, but the average client might not.
And while you could spend a good 20 minutes schooling them on anatomy and optimal structural function, it’s a lot easier and less time consuming to instead ask them to bring their shoulder blades toward their back pockets or corkscrew the hands into the floor. This is the primary concept behind our “Swing Thoughts” which were designed to create a visual reference/guide to help everyone understand exactly what is expected in an efficient and easily understood way.
Experiment with your language choices and notice your client’s responses to them. When you describe an exercise, do their eyes glaze over or do you see a lightbulb? In the same way that you assess movement patterns and adjust your movement plan accordingly, assess how your words resonate with clients and adjust your language choices, if necessary.
Visual Learning.
It can be endlessly frustrating trying to describe to a client his movement dysfunction. When performing an overhead squat, it’s easy for you to see that they have a left lateral shift in their hips, the right knee is valgus and they lack thoracic extension. If you try to explain it this way you might as well be speaking to them in gibberish. Even if you say that the right knee caves in and the upper-back rounds during the movement, the most adept client might not be able to grasp what you mean.
This is where a simple photo or video comes in handy.
Some people are visual learners, plain and simple. In these cases, showing instead of telling can give clients better insight into structural inefficiencies.
TRX Maps, for example, solves this problem by showing users exactly where the dysfunctions present and then offers solutions on what can be done to move more efficiently—all in a matter of seconds.
Should you not have TRX Maps at your disposal, your phone’s camera can also provide your client with both static (photo) and moving (video) feedback.
Be the Experience.
As the old proverb goes, being an effective communicator isn’t just about what you say, it’s about how you say it.
That’s where the phrase, “Be the experience” comes from.
Taking a client or class through a training session is about more than connecting a series of exercises together.
In order to affect real change, you have to create an experience that helps clients fully engage with a workout. How you do that depends on your coaching style.
We’ve defined three different coaching styles: The Sensei, the Coach and the Cheerleader. The Sensei, for example, is all about instruction, whereas the Coach inspires and the Cheerleader motivates. The Sensei looks at movement accuracy and precision, the Coach aims for form and intensity and the Cheerleader focuses on emotion and energy.
There is no one best approach and not everyone will be good at all three.
The best coaching style for you is the one that feels the most true to self. People have strong BS meters and will know right away when you try to be something you’re not. However, when you define which style or styles fit you best—you might choose more than one—then you’ll develop a stronger ability to connect with clients and guide them toward success.
Knowledge may be power, but it’s how you communicate that knowledge that sparks real, lasting change.
To learn more about the best ways to communicate with your clients check out TRX Education.
Click here to check out TRX Education in the US!
Click here to check out TRX Education in the UK!
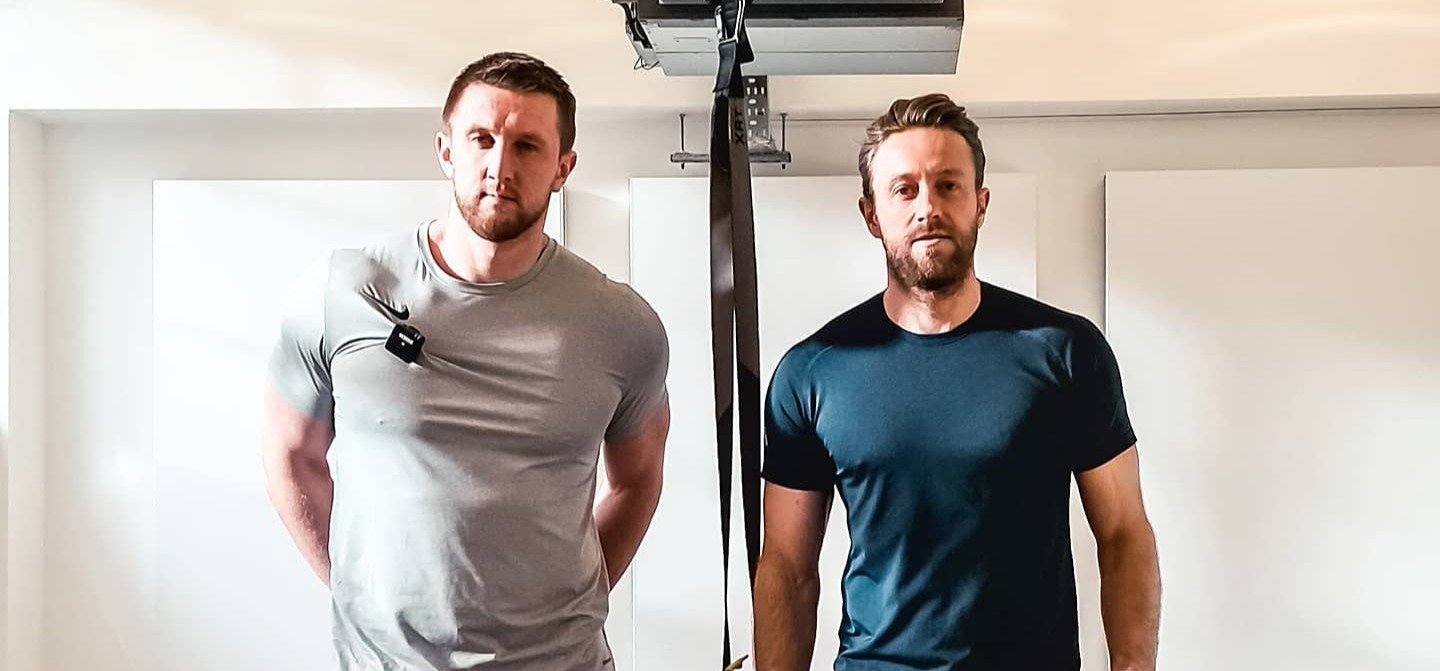
How To Become a Wildly Successful Virtual Trainer
This year hasn’t been business as usual at Equilibrium, but—spoiler alert—this isn’t a Covid-19 sob story.
A year ago, Equilibrium co-founders Niko Algieri and Jay Brockway were walking away from the dream studio they had built in London. They had rows of neatly-hung TRX straps, a collection of pricey treadmills, and a roster of celebrity clients. They also had rent totaling more than £50,000 annually and a bad business partnership.
“We had this beautiful studio and brought in all these celebrities, but I wasn't making loads of money where I could buy a nice car, buy a house. It's impossible. I could eat and I could live, but I couldn't buy anything nice,” Algieri explained.
The studio was beautiful, but it was a drain on their bank accounts. Equilibrium needed a reset, so Algieri and Brockway decided to leave their picture-perfect space behind and start over.
But, again, this isn’t a sad story.
Let’s backtrack for a moment. Algieri started in the fitness business 12 years ago. Brockway, his brother, joined him four years later. The brothers built a reputation in personal training and through social media. (Algieri has more than 20,000 Instagram followers, and Brockway has more than 9,000.) Between hard work and social media savvy, they grew their client base, opened a gym, and started selling out group classes.
When they left their posh brick-and-mortar digs and group fitness behind, their old personal training clients came calling. Soon, they were training clients in their homes, and had almost no overhead expenses. When a friend offered them a smaller, more affordable space for personal training, Equilibrium found its new home.
Then the pandemic happened.
Prior to the coronavirus outbreak, Equilibrium was only offering in-person personal training sessions. If Algieri and Brockway were to continue making a living, they would have to make their client appointments virtual.
That sparked an idea. If they were training their London clients online, why couldn’t they tap into their social media following and offer virtual training to clients in other cities, too? And, if all fitness classes were becoming virtual classes, why not reboot their Equilibrium group classes on Zoom?
“With Covid and the virtual class experience, we've added our classes back in. We're doing [personal training] and then training 40 people in a class,” Algieri said. Business, despite global stay-at-home orders, is better than ever because now the brothers are working with an international client base. From New York to Los Angeles, Zurich to Tehran, they’ve seen explosive growth in a matter of weeks.
Every trainer will encounter business obstacles at some point in their career, but—as Algieri and Brockway have demonstrated—setbacks can set the stage for bigger opportunities. Instead of maintaining the status quo or simply mitigating the damage, these trainers found a creative way to grow.
Want to learn more from the Equilibrium brothers? Sign up for their TRX Roundtable discussion on Monday, May 18, at 12 pm PST.
Check out the TRX Roundtable Series —presented via Zoom— every Monday. You can watch previous Roundtables and sign up for future ones here.

How Russian Boxers Ragosina and Povetkin use TRX
Two elite boxers - world #1 super middleweight Natascha Ragosina and Alexander Povetkin - use TRX for fight prep. Need a boxing-specific training plan? Take our quick assessment quiz for customized workouts. Their trainer Jim Barcena, who brought TRX to Russia, explains: "With boxers, all punching power comes from legs and hips, and power transfer is all core strength, so the TRX is an awesome tool for them."
TAKE OUR TRAINING QUIZ
Barcena puts the fighters through grueling 60 to 90 minute circuits that incorporate the TRX and other modalities. Some circuits feature three to five different movements that include a pushing movement, a pulling movement, an all body athletic or functional movement and a movement that focuses on sheer strength. Other circuits cycle through 12 different movements, always starting each circuit with a different movement on the TRX. He often supersets different TRX movements within one block of the circuit. For example, he'll have them perform the TRX Chest Press/Chest Fly Combo or have them superset the TRX T Deltoid Fly, TRX Y Deltoid Fly and TRX I Deltoid Fly.
When he’s in LA, Barcena often trains clients at the track at UCLA where many other trainers work with clients. “I was there the other day and Barry Bonds was working with his trainer. I could tell Barry and everyone else there was checking out what we were doing with the TRX. It's such a versatile tool. There are more uses than meets the eye.”
Povetkin's next projected fight will be against heavyweight champion Wladimir Klitschko in September.
If you're a fighter or train fighters, check out the TRX Performance: MMA Workout download. How has the TRX helped to evolve, transform and grow your own training or your personal training practice?
How To Be A More Durable Tennis Player, Three TRX Exercises
Injury. That six letter word is anathema to all tennis players. Even if you're not playing tennis at the pro level, you still want to ensure you can scramble around the court, returning volleys with ease, until it's time to retire your racquet for good. TRX Suspension Training bodyweight exercise is uniquely suited to help you attain this goal because it's a triple threat, allowing you to increase strength, flexibility and durability simultaneously. In the video below, educator Justin Price focuses on the last benefit, durability, and shows us three TRX exercises designed to address the most common injuries incurred while playing tennis, so you can remain injury-free and highly mobile in your upcoming matches.
For more, check out our dedicated tennis training page and also be sure to check out the TRX Biomechanics: Healthy Back DVD and the TRX Performance: Tennis DVD for more instruction from Justin Price. Have you used the TRX to tighten your tennis game?
Justin Price, MA, is a corrective exercise specialist and creator of The BioMechanics Method, which provides exercise solutions for people in chronic pain. He is an IDEA Personal Trainer of the Year and an educator for the American Council on Exercise, PTontheNET, PTA Global and the National Strength and Conditioning Association.
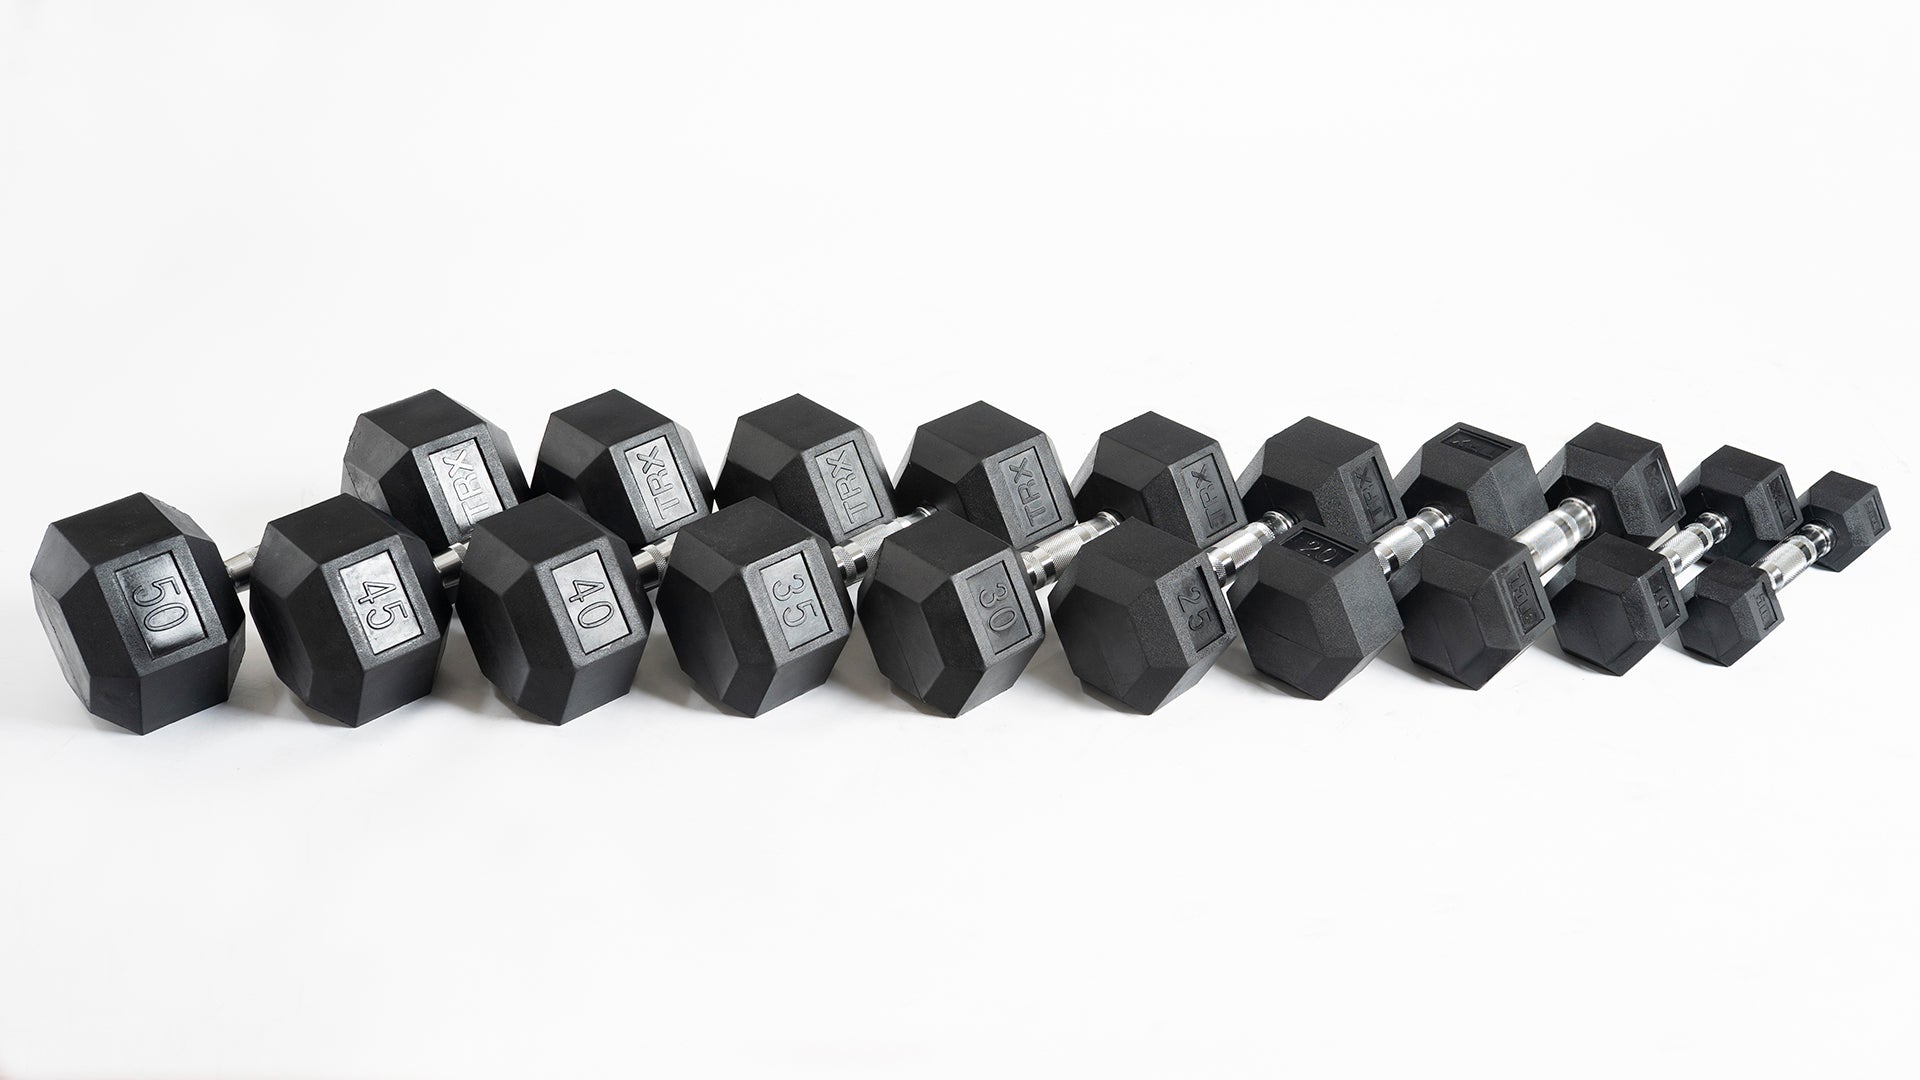
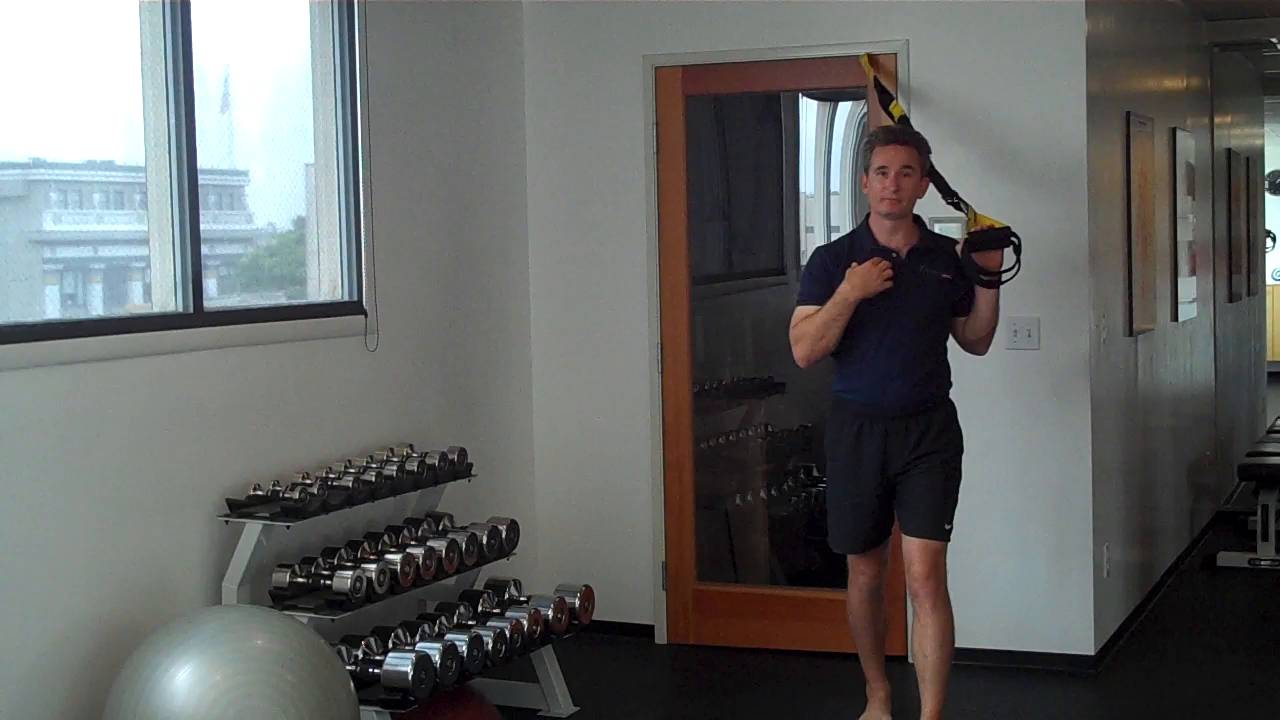
How To Add Dumbbells to Your TRX Workout
Since TRX® introduced Suspension Training to the world more than a decade ago, we’ve championed the idea that the TRX Suspension Trainer® can be a one-and-done tool. If you only have space for one piece of equipment in your home or on the go, the straps deliver a full-body workout.
But the Suspension Trainer doesn’t exist in a vacuum. It’s also easy to incorporate other equipment, like weights, into your Suspension Training routine to level up your strength training. That’s why we’re thrilled to introduce TRX Dumbbells—the latest addition to our full-body lineup of tools.
Why TRX Dumbbells?
From weights to resistance bands, TRX has spent years branching out beyond our signature straps to outfit your gym with the highest-quality fitness staples for any type of workout. We’ve developed the best kettlebells, weighted vests, power bags, and glute bands, and now we’re excited to debut the ultimate fixed-weight dumbbells.
Ranging from 5 pounds to 50 pounds, (or 2.3 kg to 22.7 kg, for the metric-minded folks),TRX Dumbbells have durable, rubber-hex ends—so they won’t go rolling away—and ergonomic handles with a knurled textured grip to encourage proper form.
Get Reacquainted With a Classic
The dumbbell icon is synonymous with strength. While many people may associate free weights with mental images of bodybuilders and CrossFitters, dumbbells aren’t just for bulking up and building mass. They can also be used for strength and toning.
Curls, rows, presses, squats: many moves you do with your TRX Suspension Trainer can also be performed with dumbbells. And you don’t have to choose between tools. Sometimes, you can have it all!
How To Add Dumbbells to Your Suspension Trainer Workout
To ease into adding dumbbells into your TRX routine, we’ve developed two mini-circuits demonstrating different approaches to the combo. Want to find the perfect combination of TRX and dumbbell exercises for your strength level? Take our quick assessment quiz to get a personalized training plan.
TAKE OUR TRAINING QUIZ
The first set pairs similar movements on both the TRX Suspension Trainer and TRX Dumbbells, and the second set incorporates dumbbells into your favorite Suspension Trainer exercises.
Let’s get started!
Superset Cardio Burst
For this superset series, we’re letting the TRX Dumbbells and TRX Suspension Trainer shine individually by pairing slight variations of the same exercise using each tool. Our three combos are:
TRX Jump Squat + Dumbbell Loaded Squats
TRX Sprinters + Dumbbell Stepback Lunges
TRX Hamstring Curl + Dumbbell Hip Thrusters
You’ll be doing each move for 45 seconds, followed by a 15 second break to reset with the next move. Total circuit time: 6 minutes. Feeling feisty? Double the set for a 12-minute burn.
TRX Jump Squat + Dumbbell Loaded Squats
Start with your straps adjusted to mid-length. Stand facing the anchor, heels planted hip distance apart, and lightly grip the handles. Drop low into your squat, and drive back up into a jump, lifting off from your toes and landing on your toes. Keep the movement fluid for maximum benefit.
For the Loaded Squats, you’ll once again start with your heels planted hip-distance apart. Rack your dumbbells on your shoulders—we suggest a set of mediums or heavies—and proceed to drop into a squat, and fire back up to full extension. For your safety, keep your heels on the ground for this move. (In other words, no jumping!)
TRX Sprinters + Dumbbell Stepback Lunges
Fully lengthen the straps, and stand facing away from the anchor point with the straps threaded under your arms. Keep your chest forward, and walk your feet back until your body is forming a 45-degree angle with the floor. The angle may feel a little weird, but the Suspension Trainer will support your bodyweight.
Next, pick one foot to be your planted or forward foot: that foot will stay connected with the floor as your other foot steps back into a lunge. Return to your neutral position—feet standing parallel—by driving off your forward, planted foot and activating your front quad.
Once you get the hang of that movement, you can add a balance component by not letting your “free” foot touch the floor at the front of the movement. Finally, you can either speed up or add a hop to each rep for an additional challenge. Don’t forget to spend equal time on each leg!
For your Loaded Stepback Lunges, you’ll hold either one dumbbell in each hand by your sides, like a suitcase, or grab the rubber ends of a single dumbbell and hold it next to your chest, under your collarbone. Keep one foot firmly planted, and step back into a lunge with the second foot. Both knees should bend to 90-degree angles, and your back knee should hover just above the floor. Drive forward to standing through the planted, front foot, and repeat the move, alternating between sides.
TRX Hamstring Curls + Dumbbell Hip Thrusters
For the TRX Hamstring Curl, adjust your foot cradles to the mid-calf position, and start lying on the ground, face up, with your heels resting in the foot cradles. In this move, you’ll begin firing through your quads and posterior chain to lift your backside off the ground. Once you’re flexing and floating, pull your knees in toward your chest, and then fully extend your legs.
If the back of your body feels like it’s on fire, you’re doing it right!
You'll return to land for your Dumbbell Hip Thrusters. Again, you’ll lie down, facing up. Bend your knees to form a triangle with the ground, and keep your feet flat on the floor. Load one or two medium or heavy dumbbells on your hips, and be careful to hold them in place.
With your shoulder blades firmly connected with the floor, engage your glutes and press your hips—weights and all—up toward the sky. (You’ve reached the top of the movement when you’ve straightened out your hip crease.) Drop your booty back to the floor, and repeat!
It Takes Two
In the second circuit of our workout, we’ll incorporate dumbbells into three Suspension Trainer exercises.
Don’t breathe a sigh of relief too soon: this isn’t a shorter series. Since these are single-side moves, you’ll have to complete them on both sides of your body. The exercises in this set are:
TRX Dumbbell Power Pulls
TRX Lunges with Dumbbells
TRX Plank with Renegade Rows
TRX Dumbbell Power Pulls
For the TRX Dumbbell Power Pulls, adjust your straps to the fully shortened length. (Pro-tip: If you want to keep the free handle from swinging while you work, you can thread the free handle through the triangle of the handle you’re using.)
Start with the Suspension Trainer handle in your left hand, with your left elbow pulled back and tight to your body. Your left palm should be facing inward while holding the handle. In your right hand, you’ll be holding a light or medium dumbbell.
Keeping your body squared with your anchor point, extend your left arm completely straight, then pull the left elbow all the way back. As you pull the left elbow back, you’ll reach the right hand and dumbbell up toward the anchor point. When you release and extend the left arm, you’ll rotate the right hand and dumbbell out and back to your right side for an opener.
As you complete reps, maintain your plank: your ears, shoulders, hips, and ankles should all be in one line. After 45 seconds on the first side, take a fifteen second break, switch which hand is holding the Suspension Trainer handle, and which hand is holding the weight.
TRX Lunges with Dumbbells
Adjust your Suspension Trainer to the mid-calf length, and stand facing away from the anchor point. Place a medium dumbbell or set of dumbbells in front of you on the floor.
Choose which foot you want to suspend, and thread that foot through both foot cradles. Pick up your weight or weights. If you choose two dumbbells, you’ll hold them at your sides, like you’re carrying a pair of suitcases. If you opt for a single dumbbell, hold it in front of your chest, under your collarbone.
From your standing position, lower down on the planted, front leg to an almost-seated position, extending your suspended leg behind you. Then, pressing your front heel into the ground, drive up to straighten your front leg and return to your standing position.
Repeat for 45 seconds, then place your dumbbells on the ground and switch legs during your 15-second break. (If you need more than 15 seconds to transition safely, take your time.)
TRX Plank with Renegade Rows
We’re beefing up the TRX Plank by adding a Renegade Row using our TRX Dumbbells.
Adjust your straps to mid-calf length and kneel facing away from the anchor point. Place a medium weight or weights at the top of your mat. Thread your feet through the foot cradles, and—using either your palms as your base or your TRX Dumbbells as handles—push up into a TRX Plank.
Whether you use the floor or a dumbbell as your base, one arm will remain straight, braced on the floor or dumbbell, while the other will rep out as many rows as possible for 45 seconds.
Choose your rowing arm, and pull your dumbbell off the floor in a low-row motion—elbow tight to your ribs—while maintaining your TRX Plank. After 45 seconds, take a 15 second break and switch sides. This is an advanced move, so feel free to take breathers as needed during your 45-second active interval.
If the traditional TRX Plank is too challenging, you can lower down to the floor, slide both of the foot cradles onto a single foot, and suspend only one leg while using your unsuspended foot as a kickstand on the floor. (Both legs will still be activated to support your plank and Renegade Row.)
One of the many strengths of TRX Dumbbells is they can be paired with so many tools in the TRX lineup—such as the Suspension Trainer and Glute Bands— to create more challenging workouts.
Can you use TRX Dumbbells on their own? Absolutely! And you probably will. But when you’re ready to test the theory that two tools are better than one—when you’re ready to challenge yourself with more demanding workouts—these TRX Dumbbell exercises will help you unlock next-level strength potential.

How Much Should You TRX?
One of the most frequently asked questions we receive is: how often should I train using the TRX Suspension Trainer? Here, TRX Head of Human Performance Chris Frankel explains how regular TRX use can ensure your training program is varied, effective and efficient, whether your goal is to add mass, get ripped, lose weight, get strong, build endurance or cross train for your sport of choice: triathlon, skiing, cycling.
How many times per week you use the TRX is only one part of a systematic approach to training. The most basic or most sophisticated programs all start with foundational principles described by the acronym F.I.T.T., which stands for Frequency, Intensity, Time and Type. Frequency is how many times per week you train (which is your question). But how often you train is related to how hard you workout, which is Intensity. And how hard you workout determines how long you train, which is the Time component. One thing you have already answered, and it is a great answer, is the Type of exercise: TRX Training. Not sure how to optimize these variables for your specific goals? Take our quick assessment quiz to get a personalized training plan that factors in your schedule and fitness level.
TAKE OUR TRAINING QUIZ
First and foremost, proper nutrition and recovery are requirements for increasing lean mass and decreasing body fat. For most people looking to gain some muscle and cut some fat for an athletic, defined physique, working out three to six times per week will provide the necessary training stimulus. If you are new to exercise or just getting back into shape, start out training three days a week, for 40 to 60 minutes each session, with at least one day of recovery in between. As your fitness improves, increase the intensity of your exercise sessions by working at a steeper body angle, with less stability or a combination of the two. You should also add another day of training to your routine as you progress.
If you don't have a suspension trainer, pick one up today.
TRX® PRO4 SYSTEM
BUY NOW
TRX® HOME2 SYSTEM
BUY NOW
TRX® TACTICAL GYM
BUY NOW
There are some general guidelines you can use to increase strength, burn fat and improve your overall performance and durability. Some of your workouts each week should be strength based, with steep body angles and slower tempos for increased time under tension. You can alternate upper body with lower body or push with pull exercises. Some of your workouts each week should incorporate high intensity, powerful movements at faster tempos to tax your cardiovascular and muscular endurance. Some of your workouts can be a combination of strength and power, where you alternate a slow, strength exercise is with a faster, more powerful exercise.
A sample week may look like this:
Sunday
Monday
Tuesday
Wednesday
Thursday
Friday
Saturday
Rest
Strength
Power + Strength
Rest
Strength + Power
Power
Rest
Proper warm up and cool down, including mobility and flexibility work, is a must. Adding interval work is another way to improve fitness and burn fat. If you work hard, do not miss a workout and do not sacrifice form for reps, you will soon “make your body your machine.”