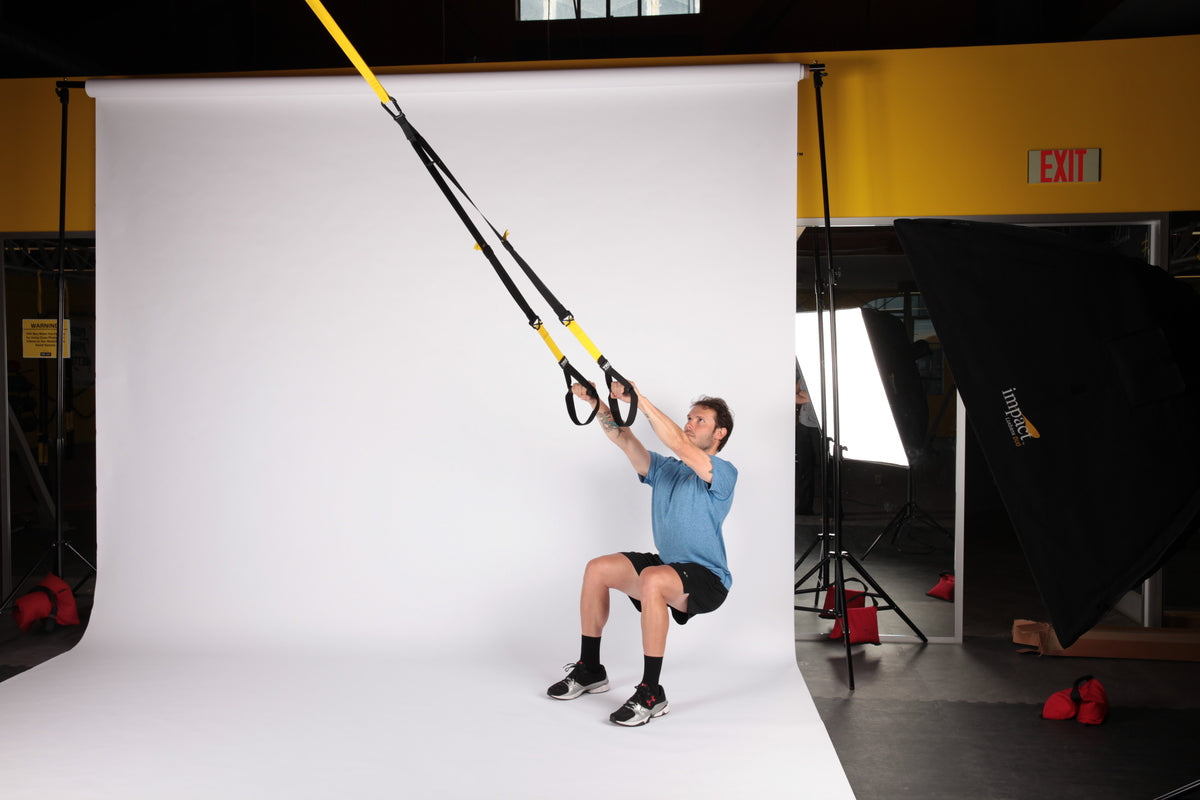
The TRX chest press uses the TRX Suspension Trainer instead of traditional weights to work the chest, while enhancing balance and overall muscular strength. The instability of the suspension straps forces continuous core engagement and shoulder stability, making the TRX chest press more challenging and effective in comparison to a traditional chest press.
If you want to add this exercise to your daily routine, we’re going to cover how to do the chest press with a TRX suspension trainer and cover some common mistakes so that you can avoid them. Let’s get started!
The Benefits of TRX Chest Press
The TRX chest press enhances upper body strength and stability, primarily targeting the chest muscles (pectoralis major and minor) while also engaging muscles in the shoulders, arms, and core. This exercise not only builds your chest but also contributes to overall muscle development, muscle strength, improved stability, and cardiovascular health.
All exercises performed on the TRX Suspension Trainer, just like the TRX chest press, activate multiple muscle groupings, making the TRX Suspension Trainer an excellent fitness tool. Working regularly on the TRX Suspension Trainer, improves everyday activities, functional fitness, and your overall strength, health, and wellbeing. For example, one major benefit when using the TRX Suspension Trainer is a stronger core, which results in enhanced posture, alleviates lower back pain, and lowers the risk of injuries.
Related: Chest Press vs. Bench Press
How to Perform the TRX Chest Press
Here's how to do a TRX chest press: Want to find the perfect TRX exercises for your chest workout? Take our quick assessment quiz for a personalized training plan that matches your strength level.
- Fully lengthen your TRX Suspension Training straps.
- Stand facing away from the anchor point with the straps running over and slightly above your shoulders.
- Place one hand on each handle with the palms facing down, straighten your arms in front of you to shoulder height, and walk your feet back towards the anchor so that you are leaning forward and up on your toes.
- Drive your shoulders down, engage your core, and create a straight line with your body from your head to your toes (a standing plank).
- Maintaining your standing plank and core engagement the entire time, inhale as you bend your elbows, lowering your chest until it reaches handle level.
- Push yourself back up to the starting position by extending the elbows, exhaling on the way back up.
- This counts as one repetition.
Muscles Worked
Primary
- Chest (pectoralis major and minor)
- Forearms
- Shoulders
- Abs
Secondary
- Middle Back
- Glutes
- Triceps
- Calves
Avoid Making these Mistakes
The TRX chest press is performed under unstable conditions, requiring careful attention to proper form and technique. Here are common mistakes to avoid during this exercise:
Bad Starting Position
After finding the starting position for the exercise and before beginning the TRX chest press, perform a body awareness check. Ensure your core is engaged, your body is in a straight line (standing plank), and your body angle (vector) is appropriate for your fitness level. Proper setup from the start is crucial to avoid injury.
Getting Rubbed By TRX Straps
If your arms are not lifted high enough, the TRX Suspension Training straps will rest on or touch your shoulders at the top of the move and shoulders and forearms at the bottom of the move. This will lead to skin chafing during the exercise. If this is happening, lift your arms slightly up so that the straps run above the shoulders and forearms without touching them.
Loose Suspension Straps
For an effective TRX exercise, it is crucial to keep the suspension straps tight throughout each movement. If slack is introduced in the straps, the intensity and effectiveness of the exercise decreases. During the TRX chest press, pay attention to the tension in your straps and adjust as needed to ensure they remain taut.
Inadequate Completion of Exercise
Lacking the strength to complete the exercise is common, especially for beginners. If you find it too challenging to perform the TRX chest press correctly, consider adjusting your body angle (vector) and foot stance. To lessen the exercise's intensity, move your feet forward, away from the anchor point. This will make you stand up straighter, reducing the angle between your body and the ground, and offer you a smaller range of motion that matches your current fitness level. Another way to decrease the difficulty of the exercise is to widen your foot stance. Increasing the distance between your feet will offer you greater stability and core control while performing the TRX chest press.
Modifications and Variations
Regress your TRX chest press for added stability and effectiveness:
- Try a staggered stance resembling a lunge position. This posture enhances stability and control, enabling you to focus on developing upper body and core strength effectively.
- Limit the range of motion by positioning your body more upright and bringing your feet more underneath you (move your feet forward). This reduces the angle between your body and the ground, making the exercise more manageable based on your fitness level.
- Opt for a wide foot stance to alleviate stress and strain during the exercise. This positioning enhances stability, ensuring a more controlled movement.
Are You Ready to Take on a Challenge?
TRX Suspension Training offers a versatile approach to exercise that adapts to different fitness levels. As you progress and build strength, you can intensify your workout using progressions for the TRX chest press.
- Position your feet closer to the anchor point. This foot placement will increase your vector and lower your body closer to the ground, intensifying core engagement during the chest press.
- Adjusting your stance so that your feet are closer together during the exercise will challenge your stability and core control.
- Perform the chest press while balancing on one leg, alternating legs with each full repetition. This variation not only targets the chest muscles but also works on balance, coordination, and stability.
- Unilateral TRX chest presses will uncover strength differences between the right and left sides of the body and require even more core strength and control. Perform the chest press with one hand on both handles. As you bend and extend the working elbow, make sure the shoulders and hips remain squared throughout the entire exercise. Note: in comparison to a bilateral TRX chest press, a unilateral TRX chest press will require a more shallow vector to perform the exercise well.
Precautions and Safety Measures
Performing exercises using equipment specifically for the introduction of instability, such as the TRX Suspension Trainer, requires more core engagement and mindfulness to correct form. If exercise movements are not done purposefully and with control, injuries can result.
Reduce your risk of injury:
- Maintain proper body positioning throughout your exercise routine.
- Avoid letting your core sag (dropping in the low back) while performing chest presses.
- Readjust your pelvis placement to a more neutral position if you feel pressure in your low back. Maintaining a neutral pelvis will help to prevent back injuries.
- Set up the TRX Suspension Trainer and conduct the TRX chest press correctly to prevent skin irritation and chafing from the straps. Avoid resting straps on your arms during chest presses, as it reduces effectiveness and can lead to post-workout discomfort.
- Perform chest presses with smooth, controlled movements to avoid jerking motions in the joints.
- Modify the exercise if needed to match your fitness level (regressions and progressions).
Stop the activity, reset the exercises and foot placement, keep a more neutral pelvis, and drive the shoulders down if you feel pain or discomfort in the low back or shoulders. Work slowly and with control, listening to your body. Your body will reveal what's working and what's not. Pushing through pain is not recommended and will lead to injuries. Consult a doctor if the pain persists after the exercise is completed.


